AWS Tutorial: Deploying Kali On AWS Using Terraform
Deploy a hacking machine in your own Virtual Private Cloud. This article will show you how to deploy Kali Linux on AWS using Terraform.


Contents
- Prerequisites
- Introduction
- Step 1: AWS User and Role
- Step 2: Terraform Code
- Step 3: SSH Tunneling
- Our First Challenge: Over The Wire!
- References
Prerequisites
- MAC/Linux Computer - I'm using MAC
- An AWS Account
- AWS CLI
- Terraform
- SSH (ssh, ssh-keygen, ssh-add, ssh-agent)
There's a lot going on here, so if you want to use this as a guide to set up your own machine, then I would recommend that you have some working knowledge on the material listed above.
You will need to setup AWS CLI and Terraform on your personal machine, and have an AWS account.
Github repo: https://github.com/schowdhury2019/Kali-AWS-Deployment
Introduction
Hello there and welcome. Here you will learn how to deploy Kali Linux on an AWS EC2 instance using Terraform.
Kali - for those of you that don't know - is distribution of Linux specialised for penetration testing. It comes with a plethora of tools installed, some can be pretty dangerous, so please be careful when you use it.
Below you will see the first version of this setup. The point was to see if it was possible setup in the first place. It's a relatively simple setup as far as deploying publicly available EC2s go.
A Virtual Private Cloud (VPC) with a public subnet housing an EC2 instance that I - or anyone else - can access using the internet.
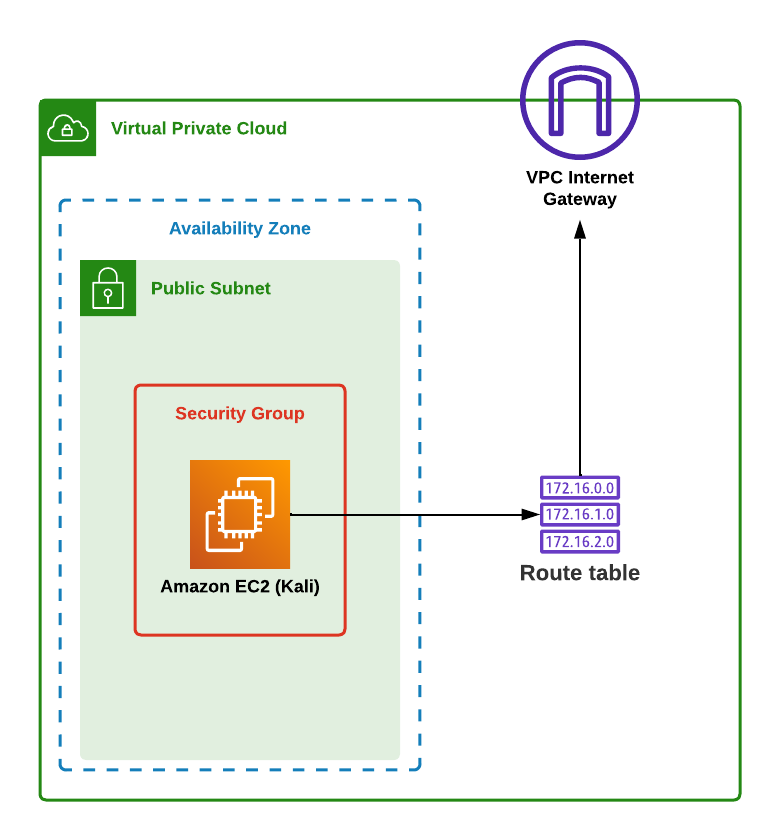
It did work. The problem, as you may have already guessed, is that it's publicly available. You want a personal server that only you have access to.
Introducing version 2: A setup that's similar to an ordinary private network you can find in any household.
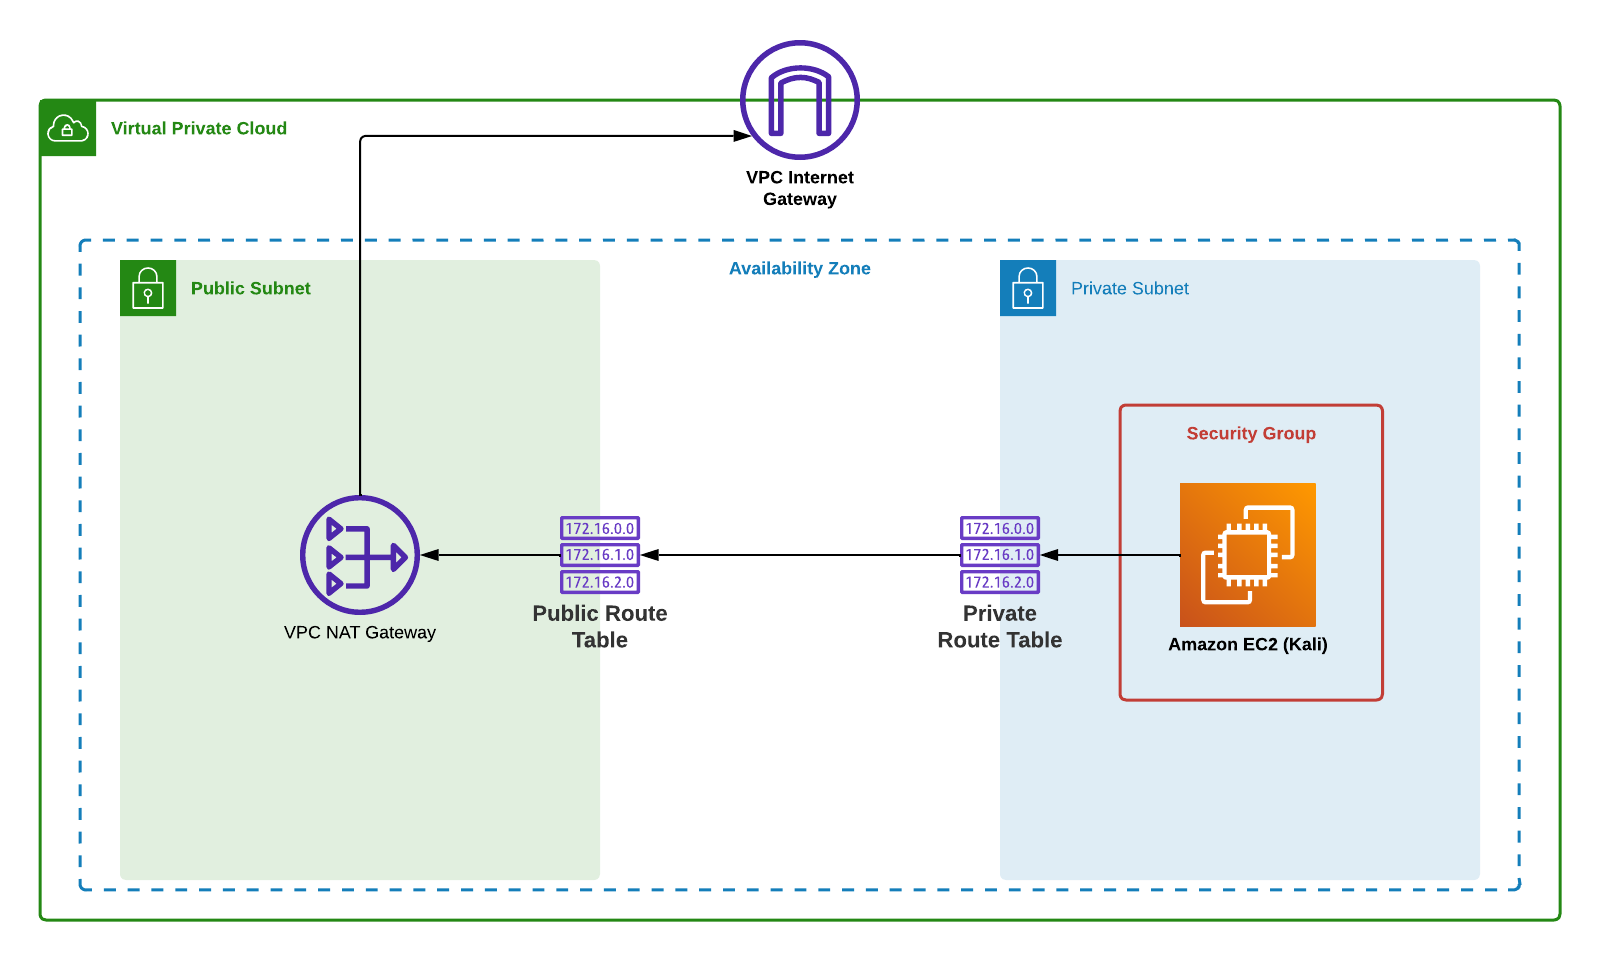
The key difference is the introduction of a private subnet plus a NAT gateway.
This solves the problem a little too well. Now nobody has access, not even the person deploying it.
The deployed instance can use the NAT Gateway for accessing the internet, but it doesn't allow for anything to access the instance itself.
Version 3: This setup allows the user to bypass the NAT Gateway via SSH tunneling.
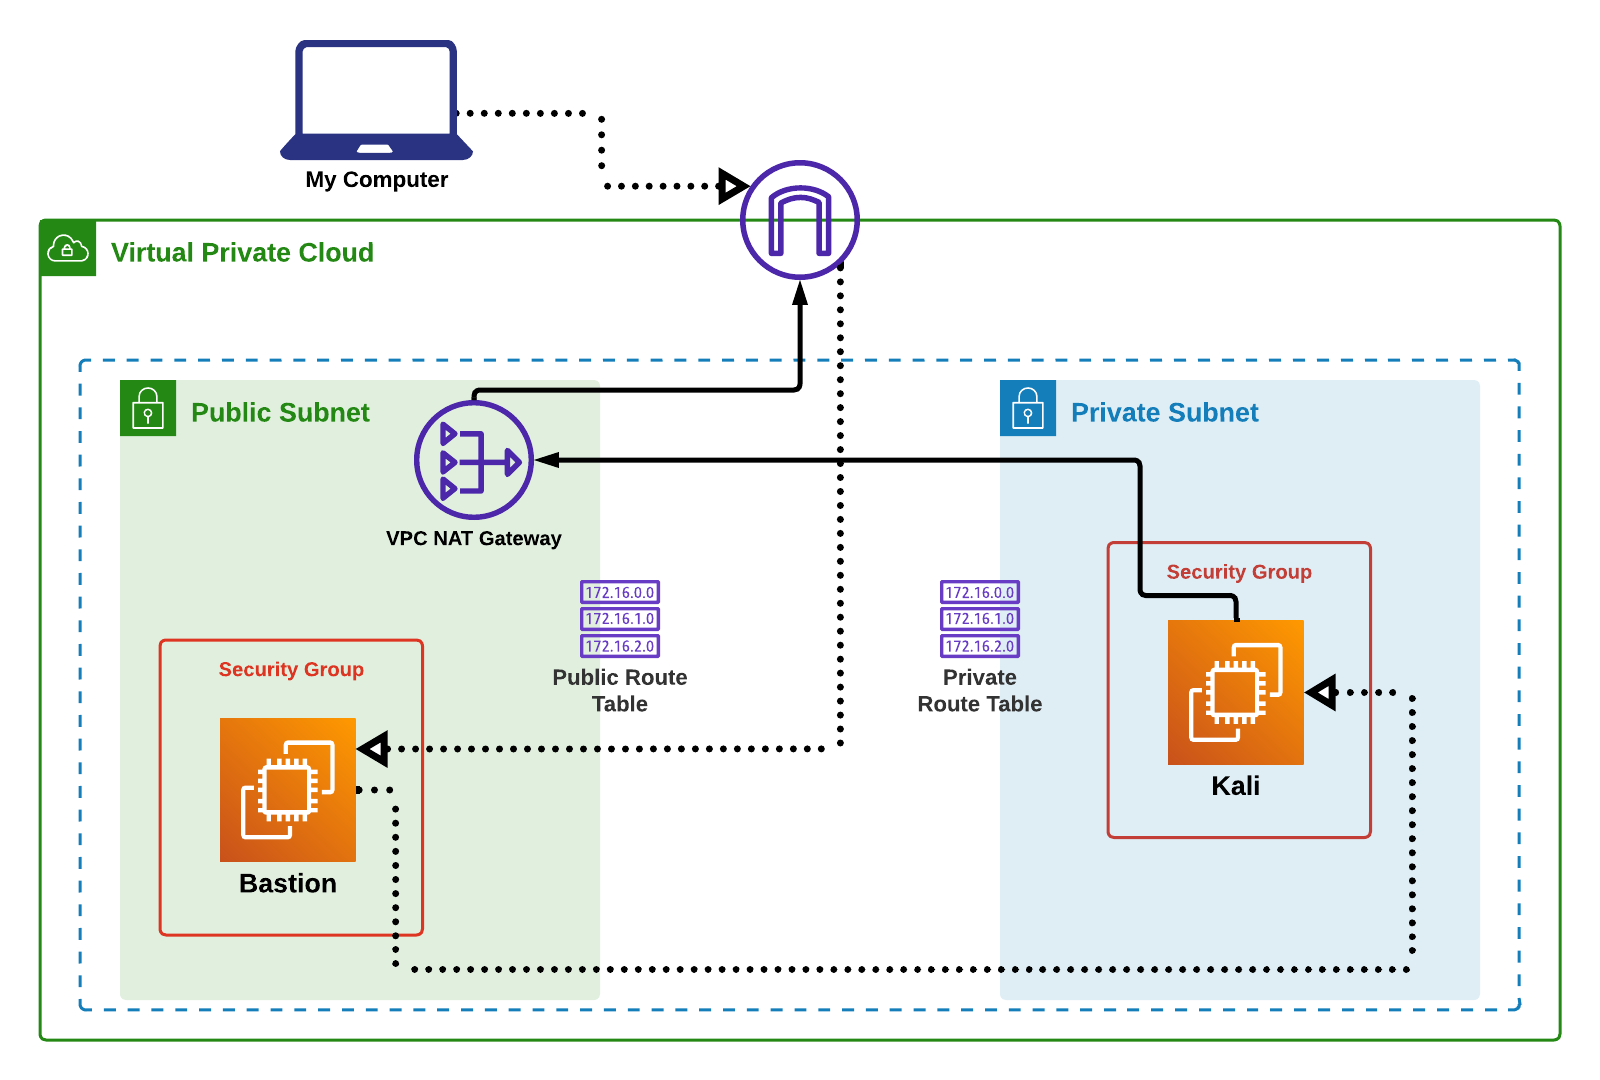
This setup is the same as V2, but with another EC2 (bastion server) in the public subnet that the user can access via SSH.
The user has the choice between two SSH techniques to access the Kali isntance: SSH agent forwarding or SSH tunneling. These will be explained below.
Now that we understand the basic premise, it's time to start building.
Step 1: AWS User and Role
The first thing you need is to set up an IAM User on your AWS account.
You need permissions to interact with anything in AWS, so you'll have to start with creating a Role that allows Terraform to make API calls and create infrastructure on your AWS account.
Without this, we can't create anything so it's important to get this right.
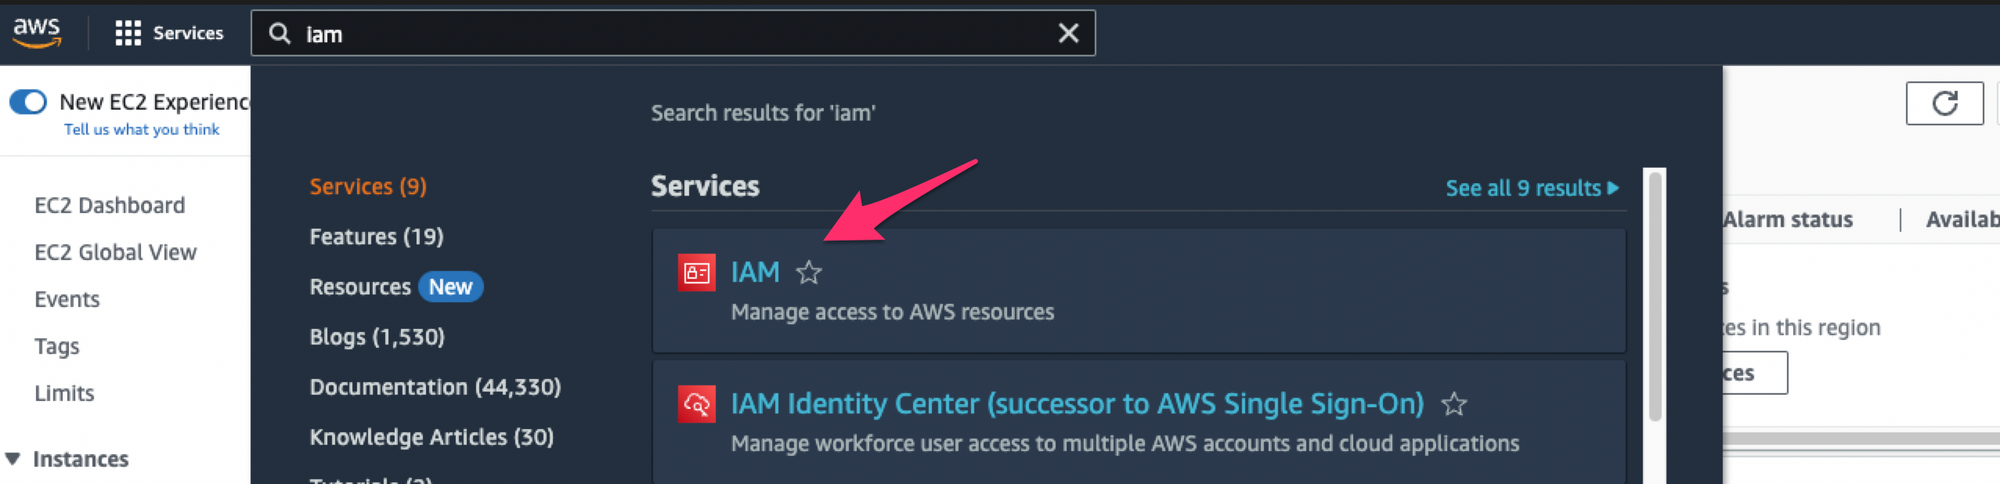
Creating A User
Log into your AWS account and on the search bar, find and select the IAM service.
On the left, click on Users, then Add user

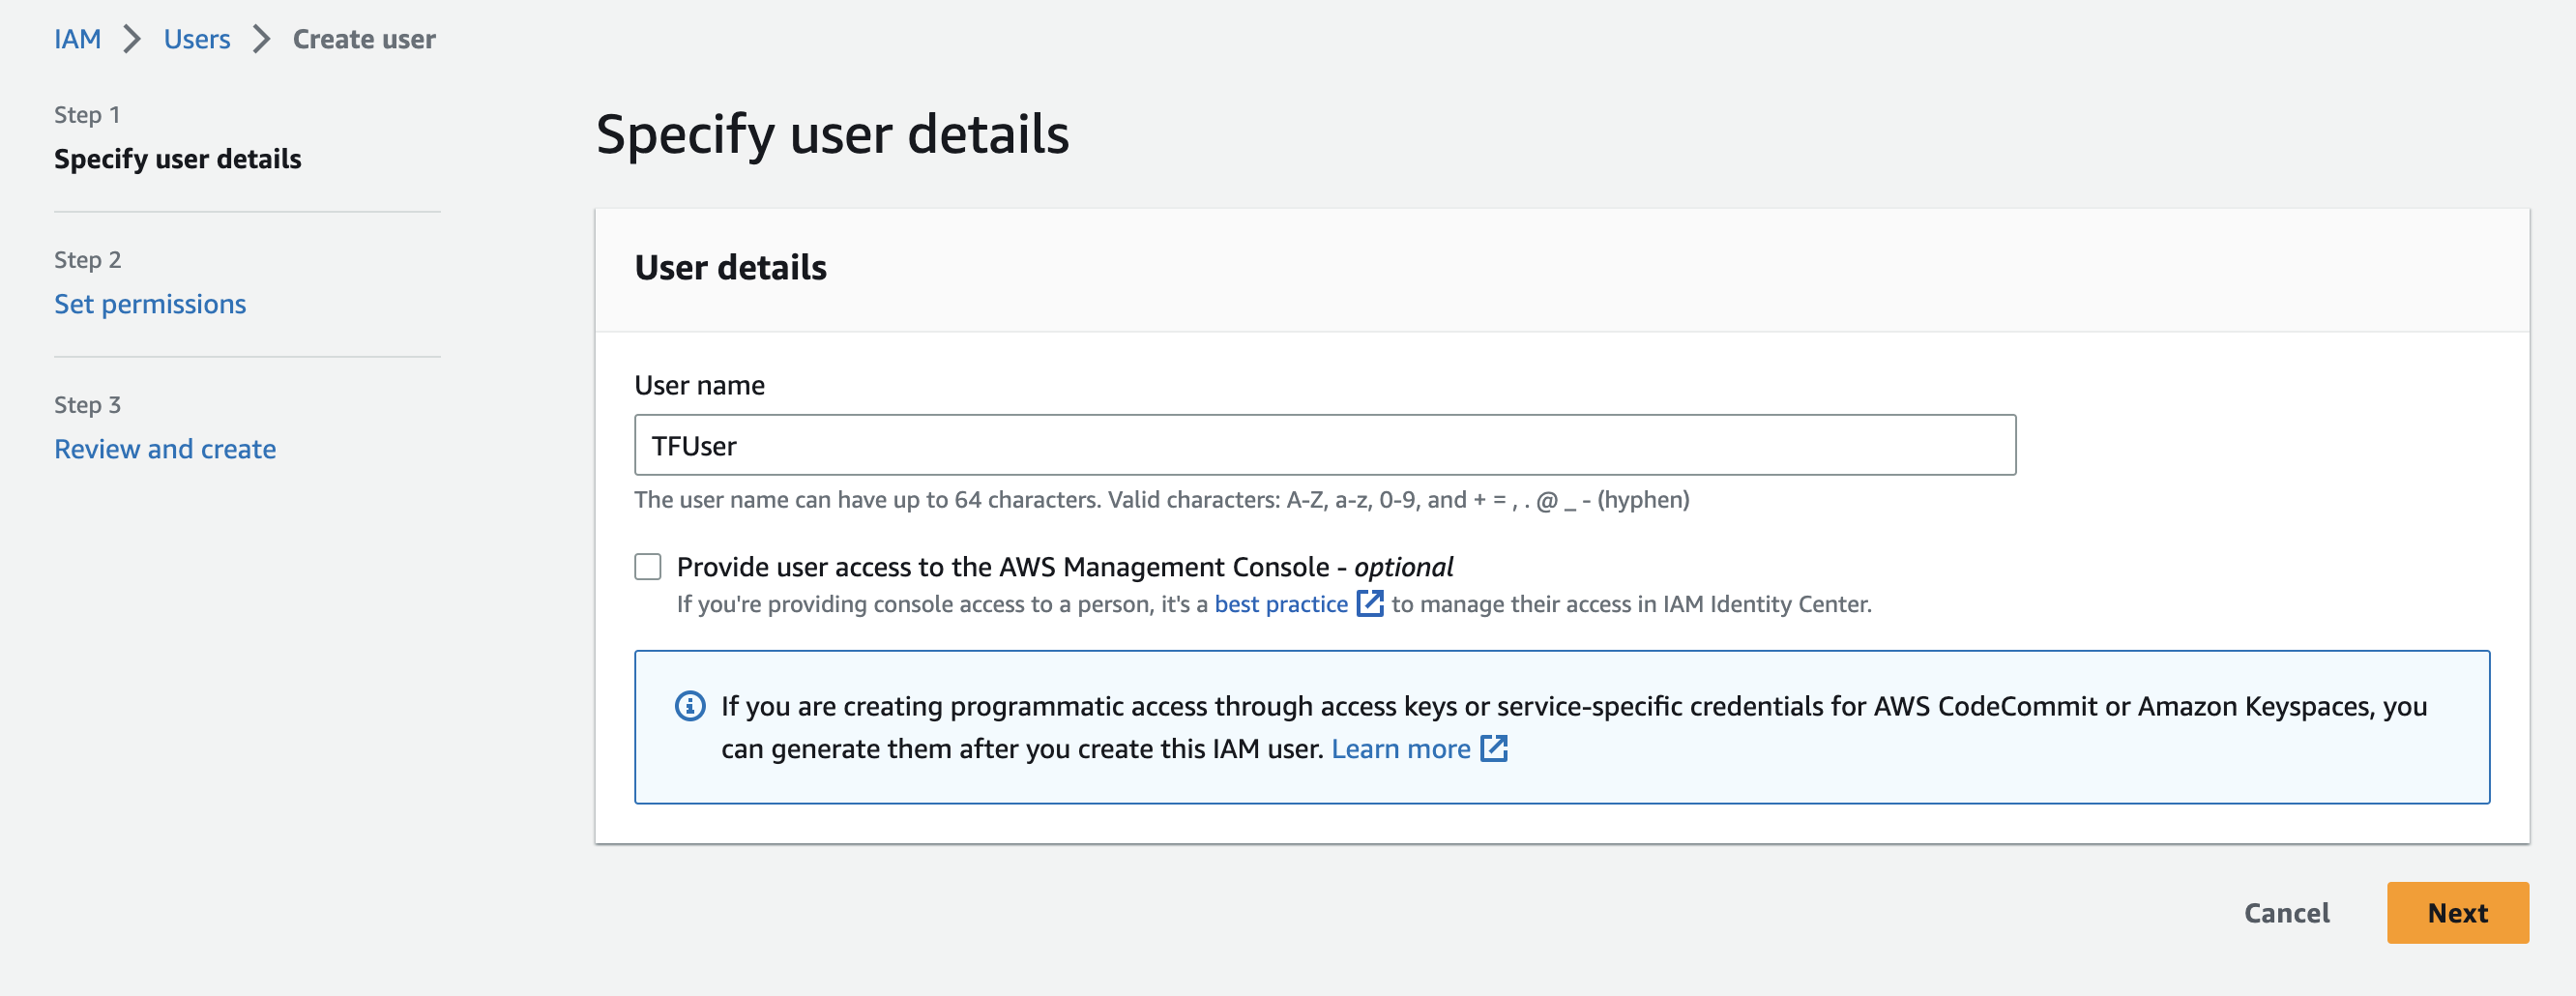
Specify name, click next
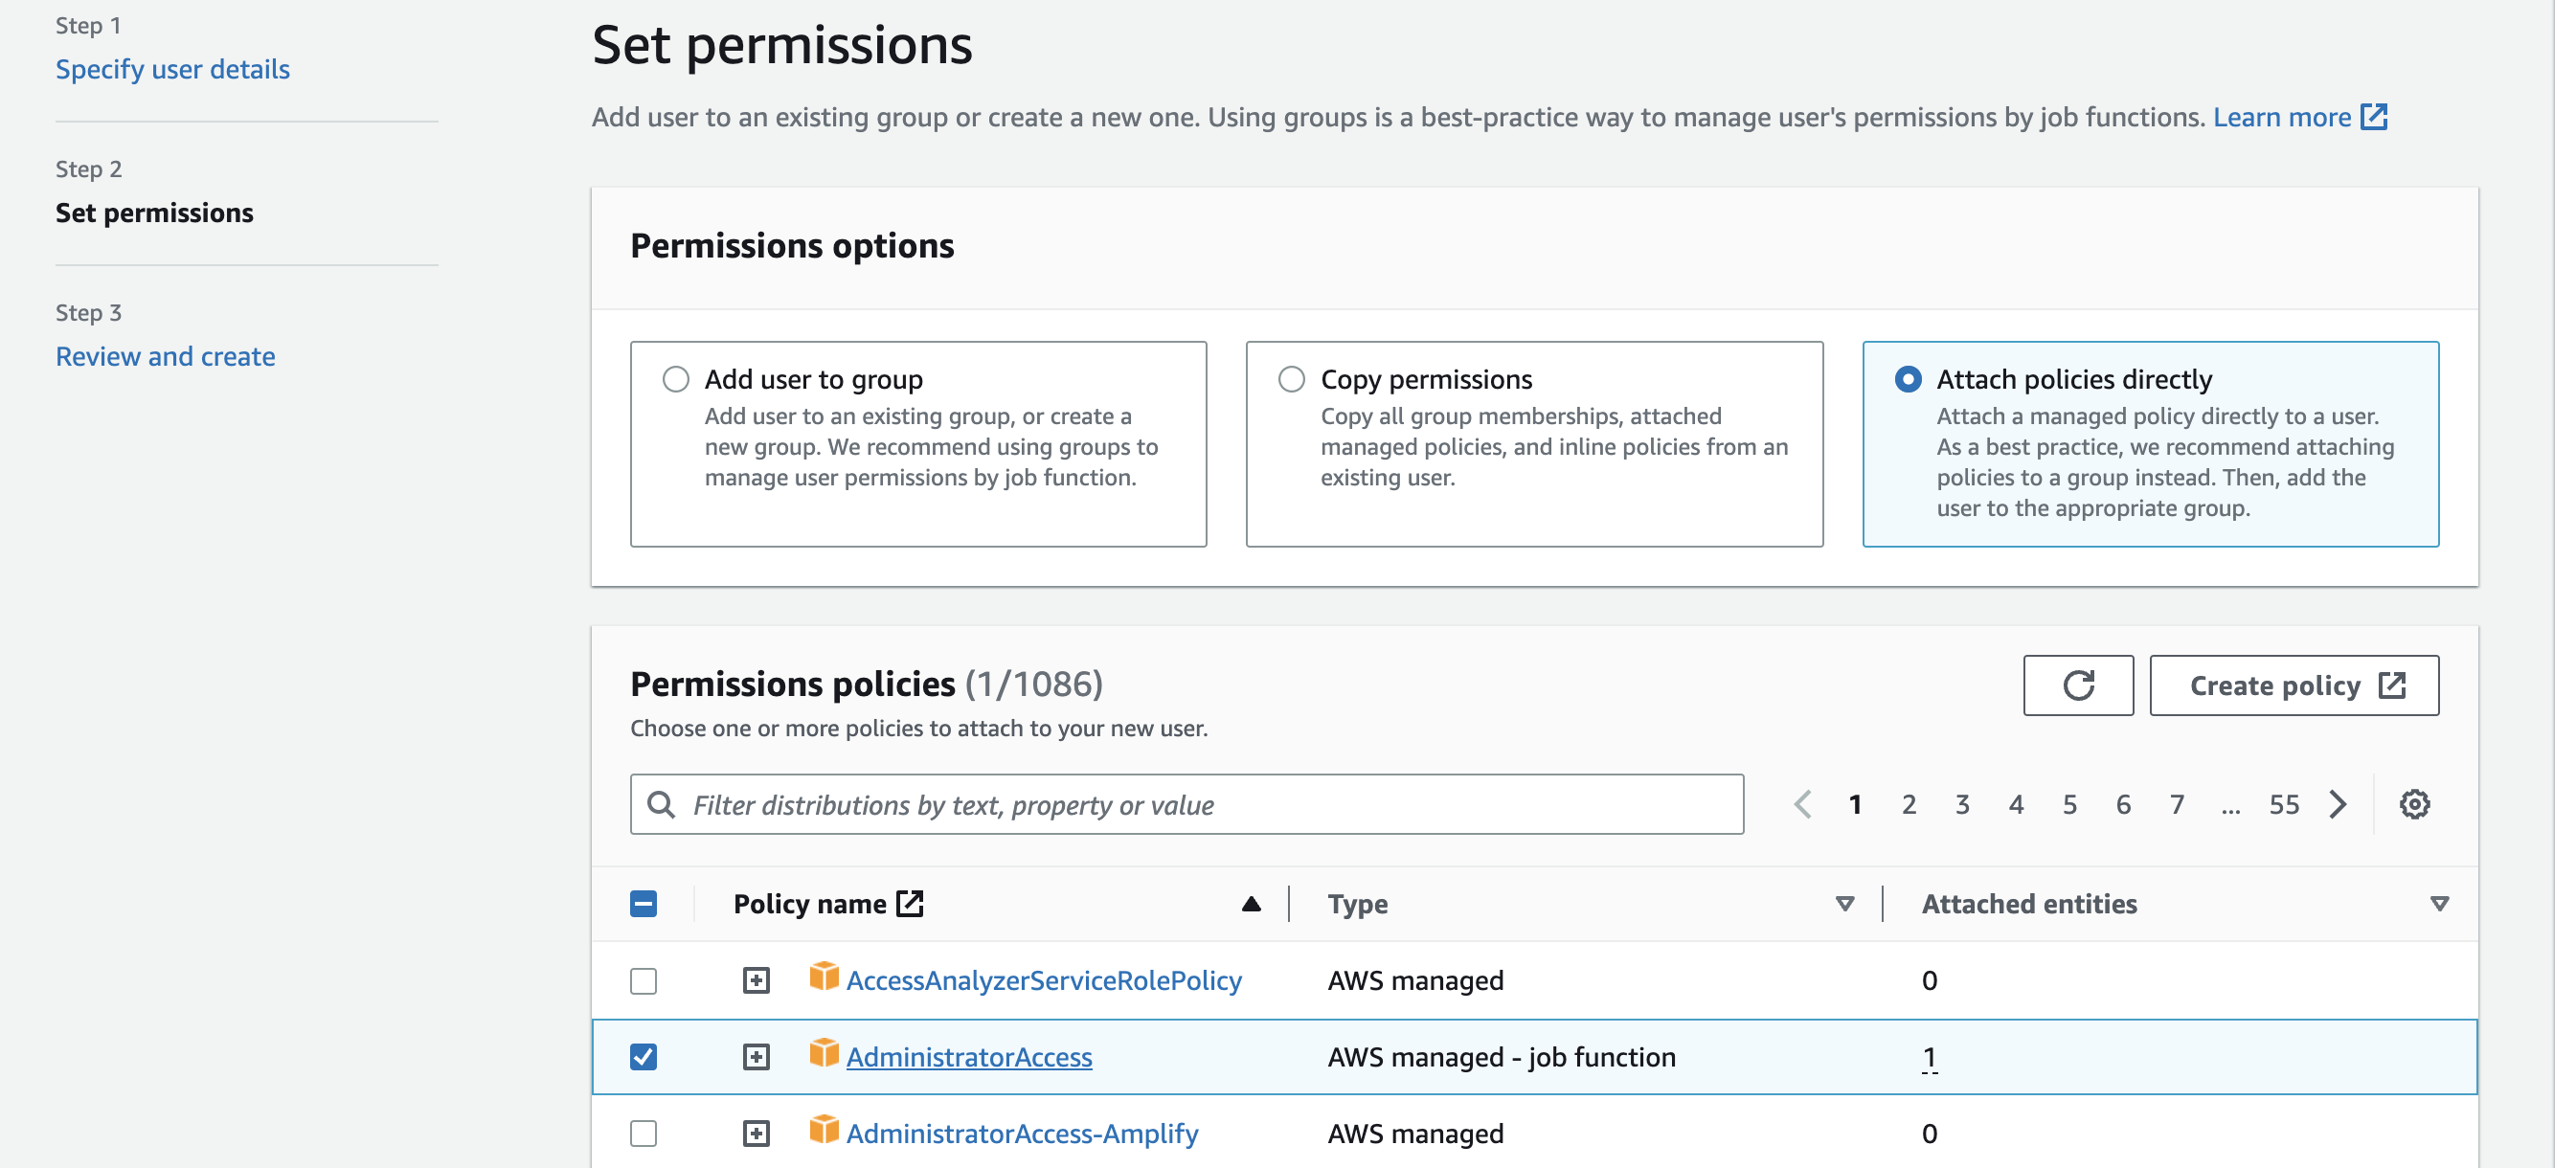
Select Attach policies directly, and search for a tick the box next to AdministratorAccess; scroll to the bottom and click next.
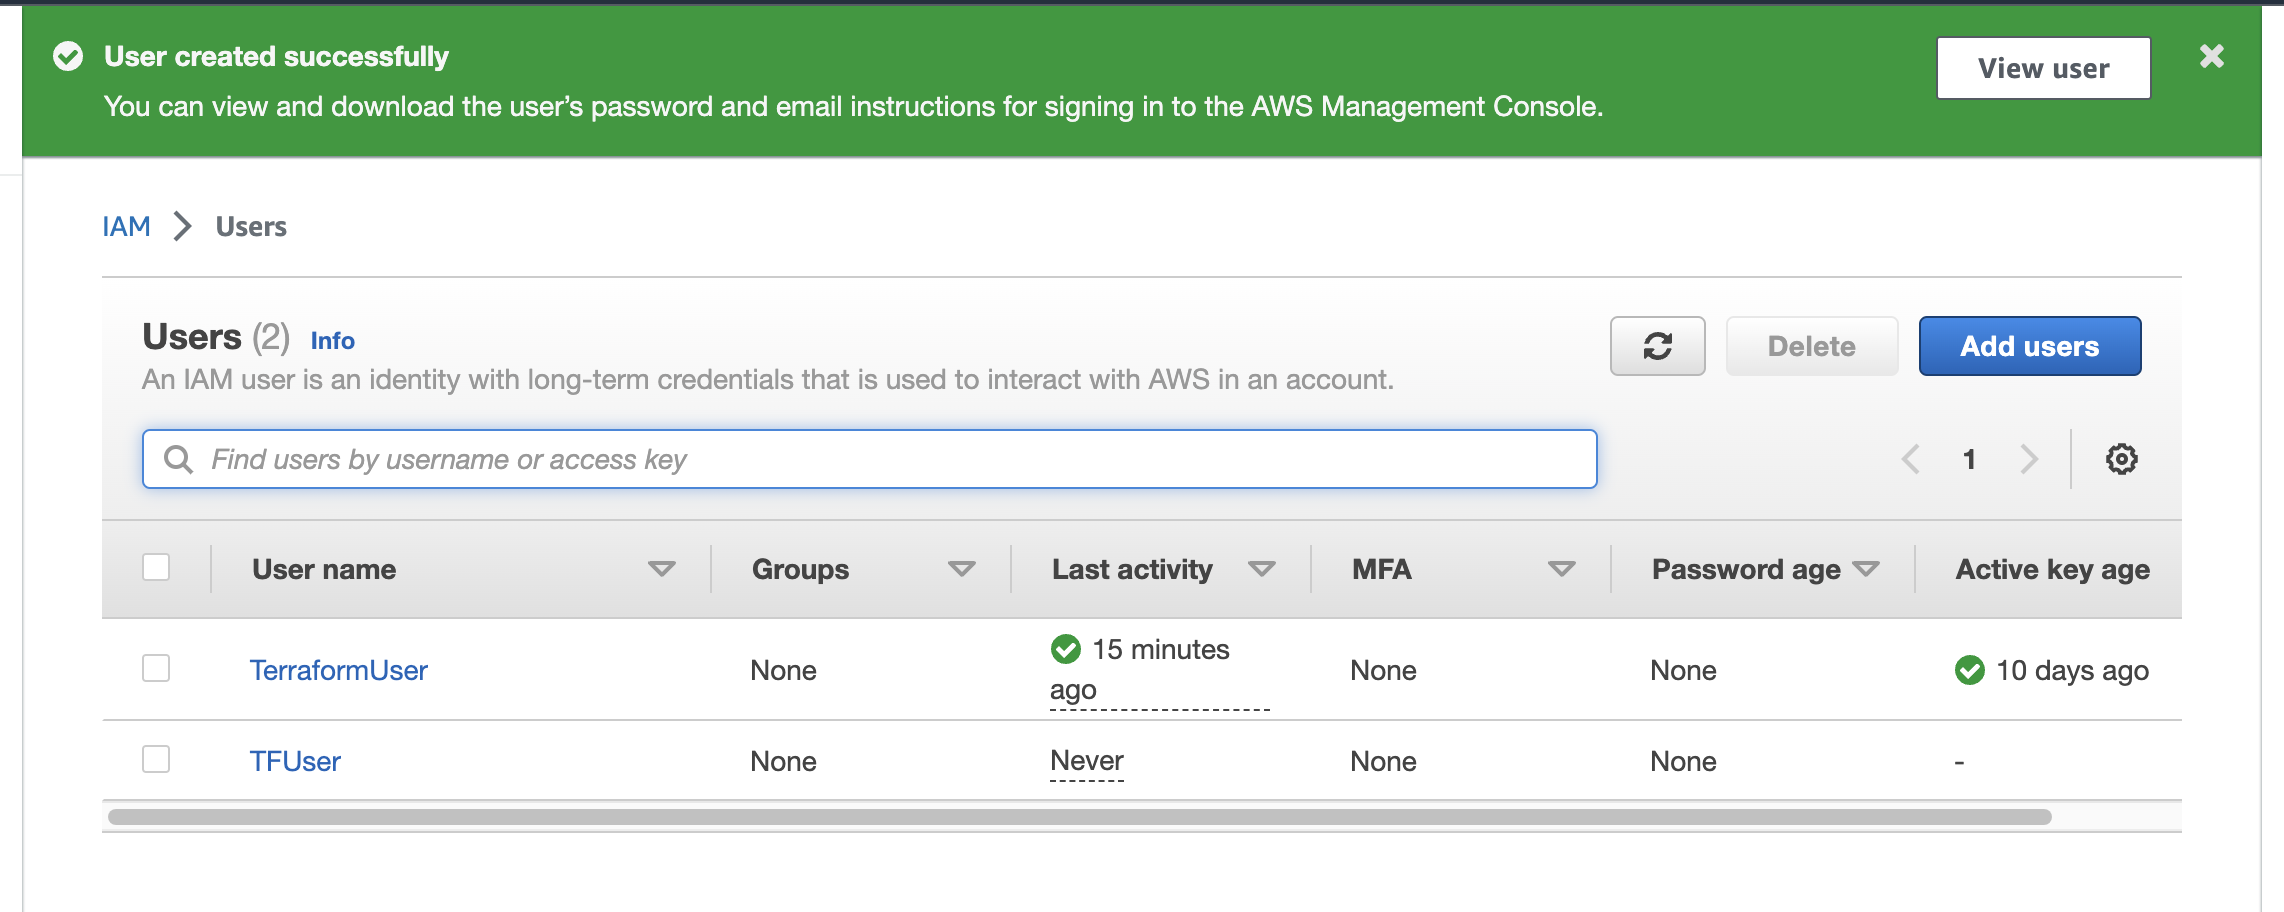
Then click Create User, and it should appear here
Generating Access Keys
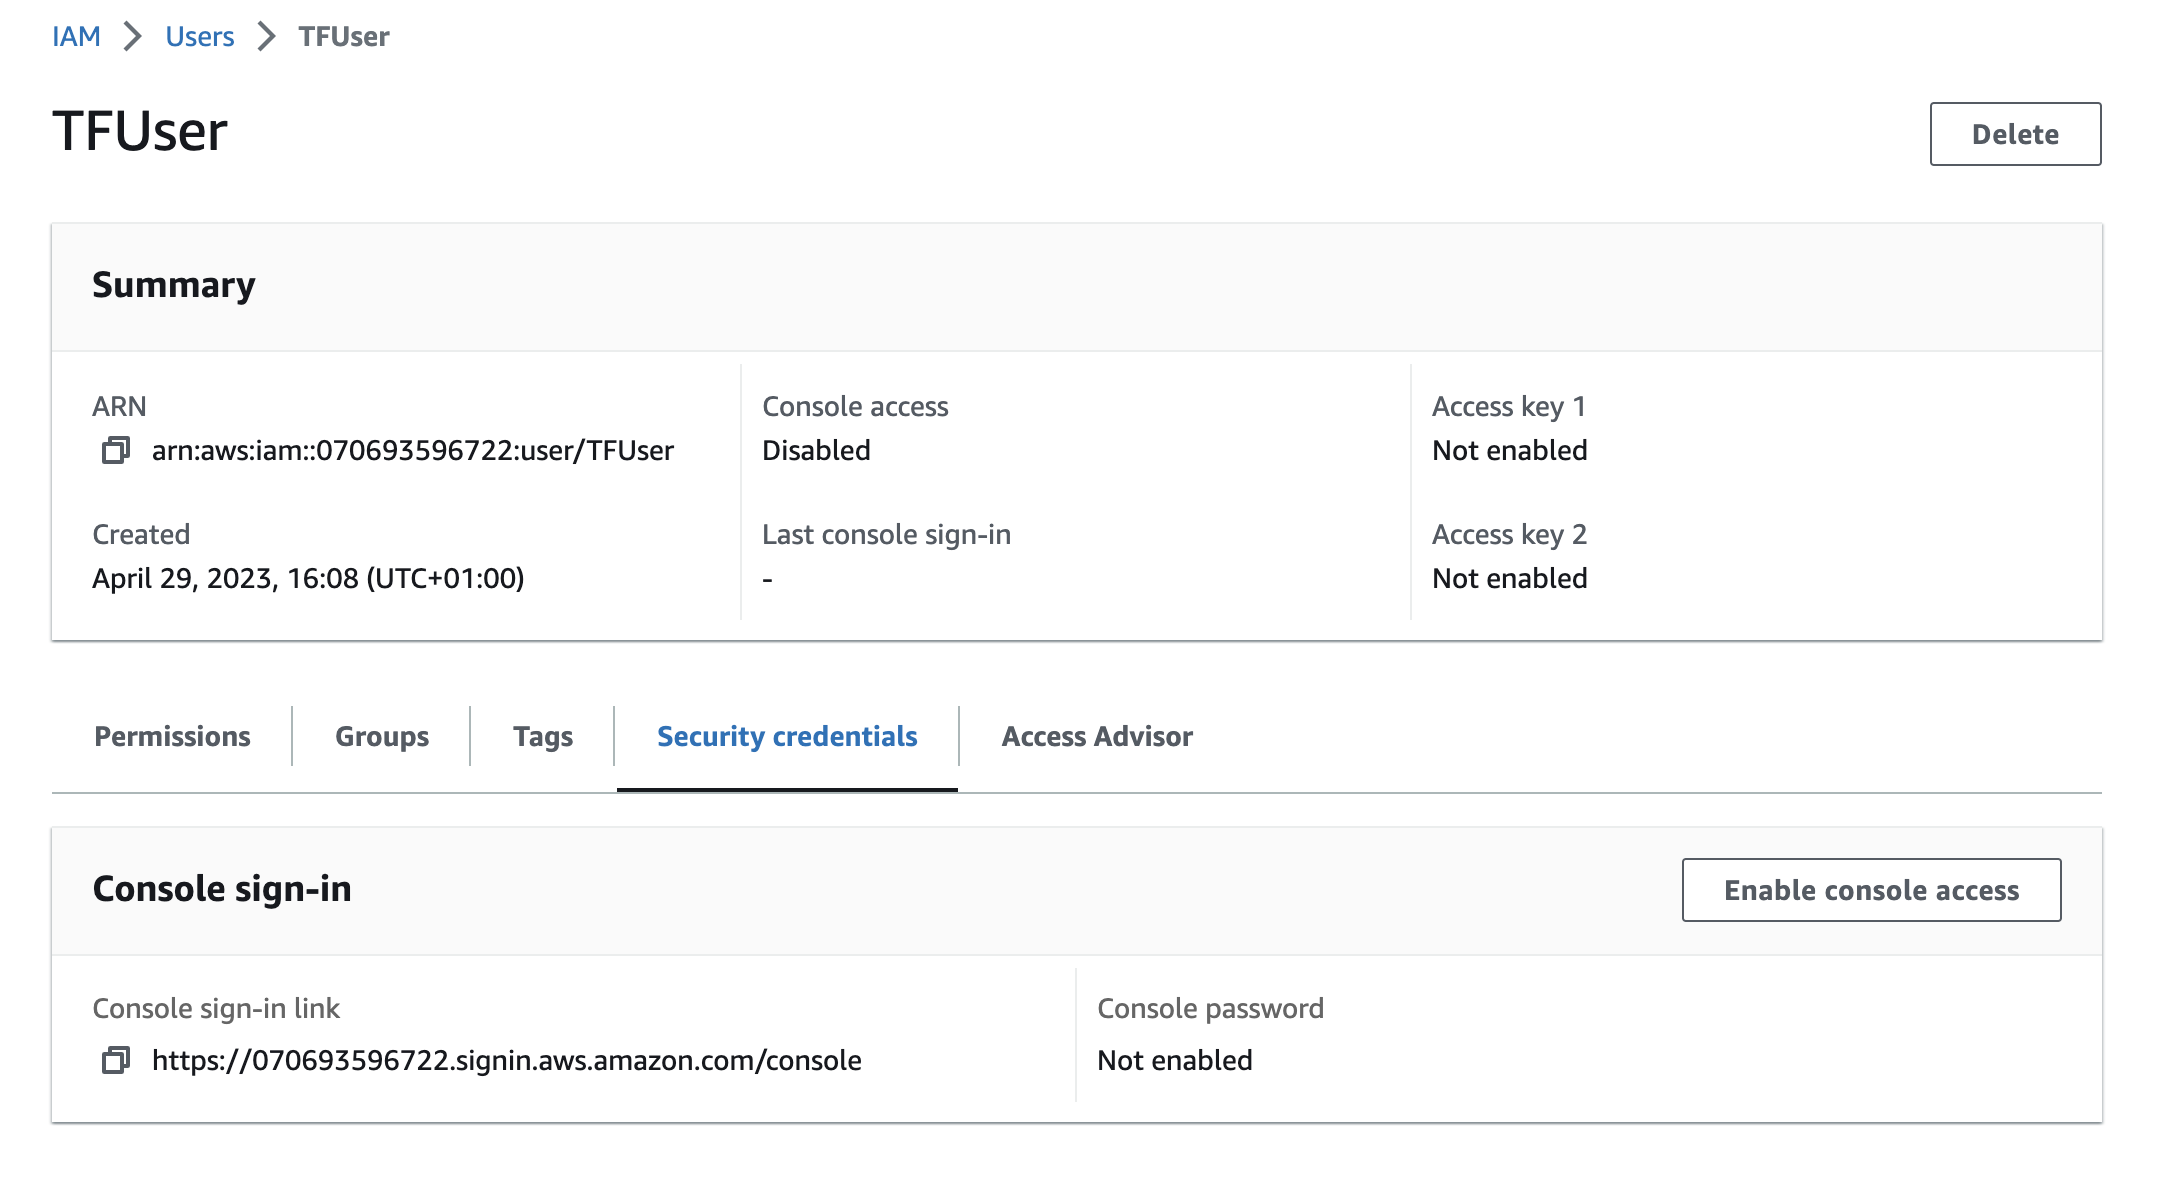
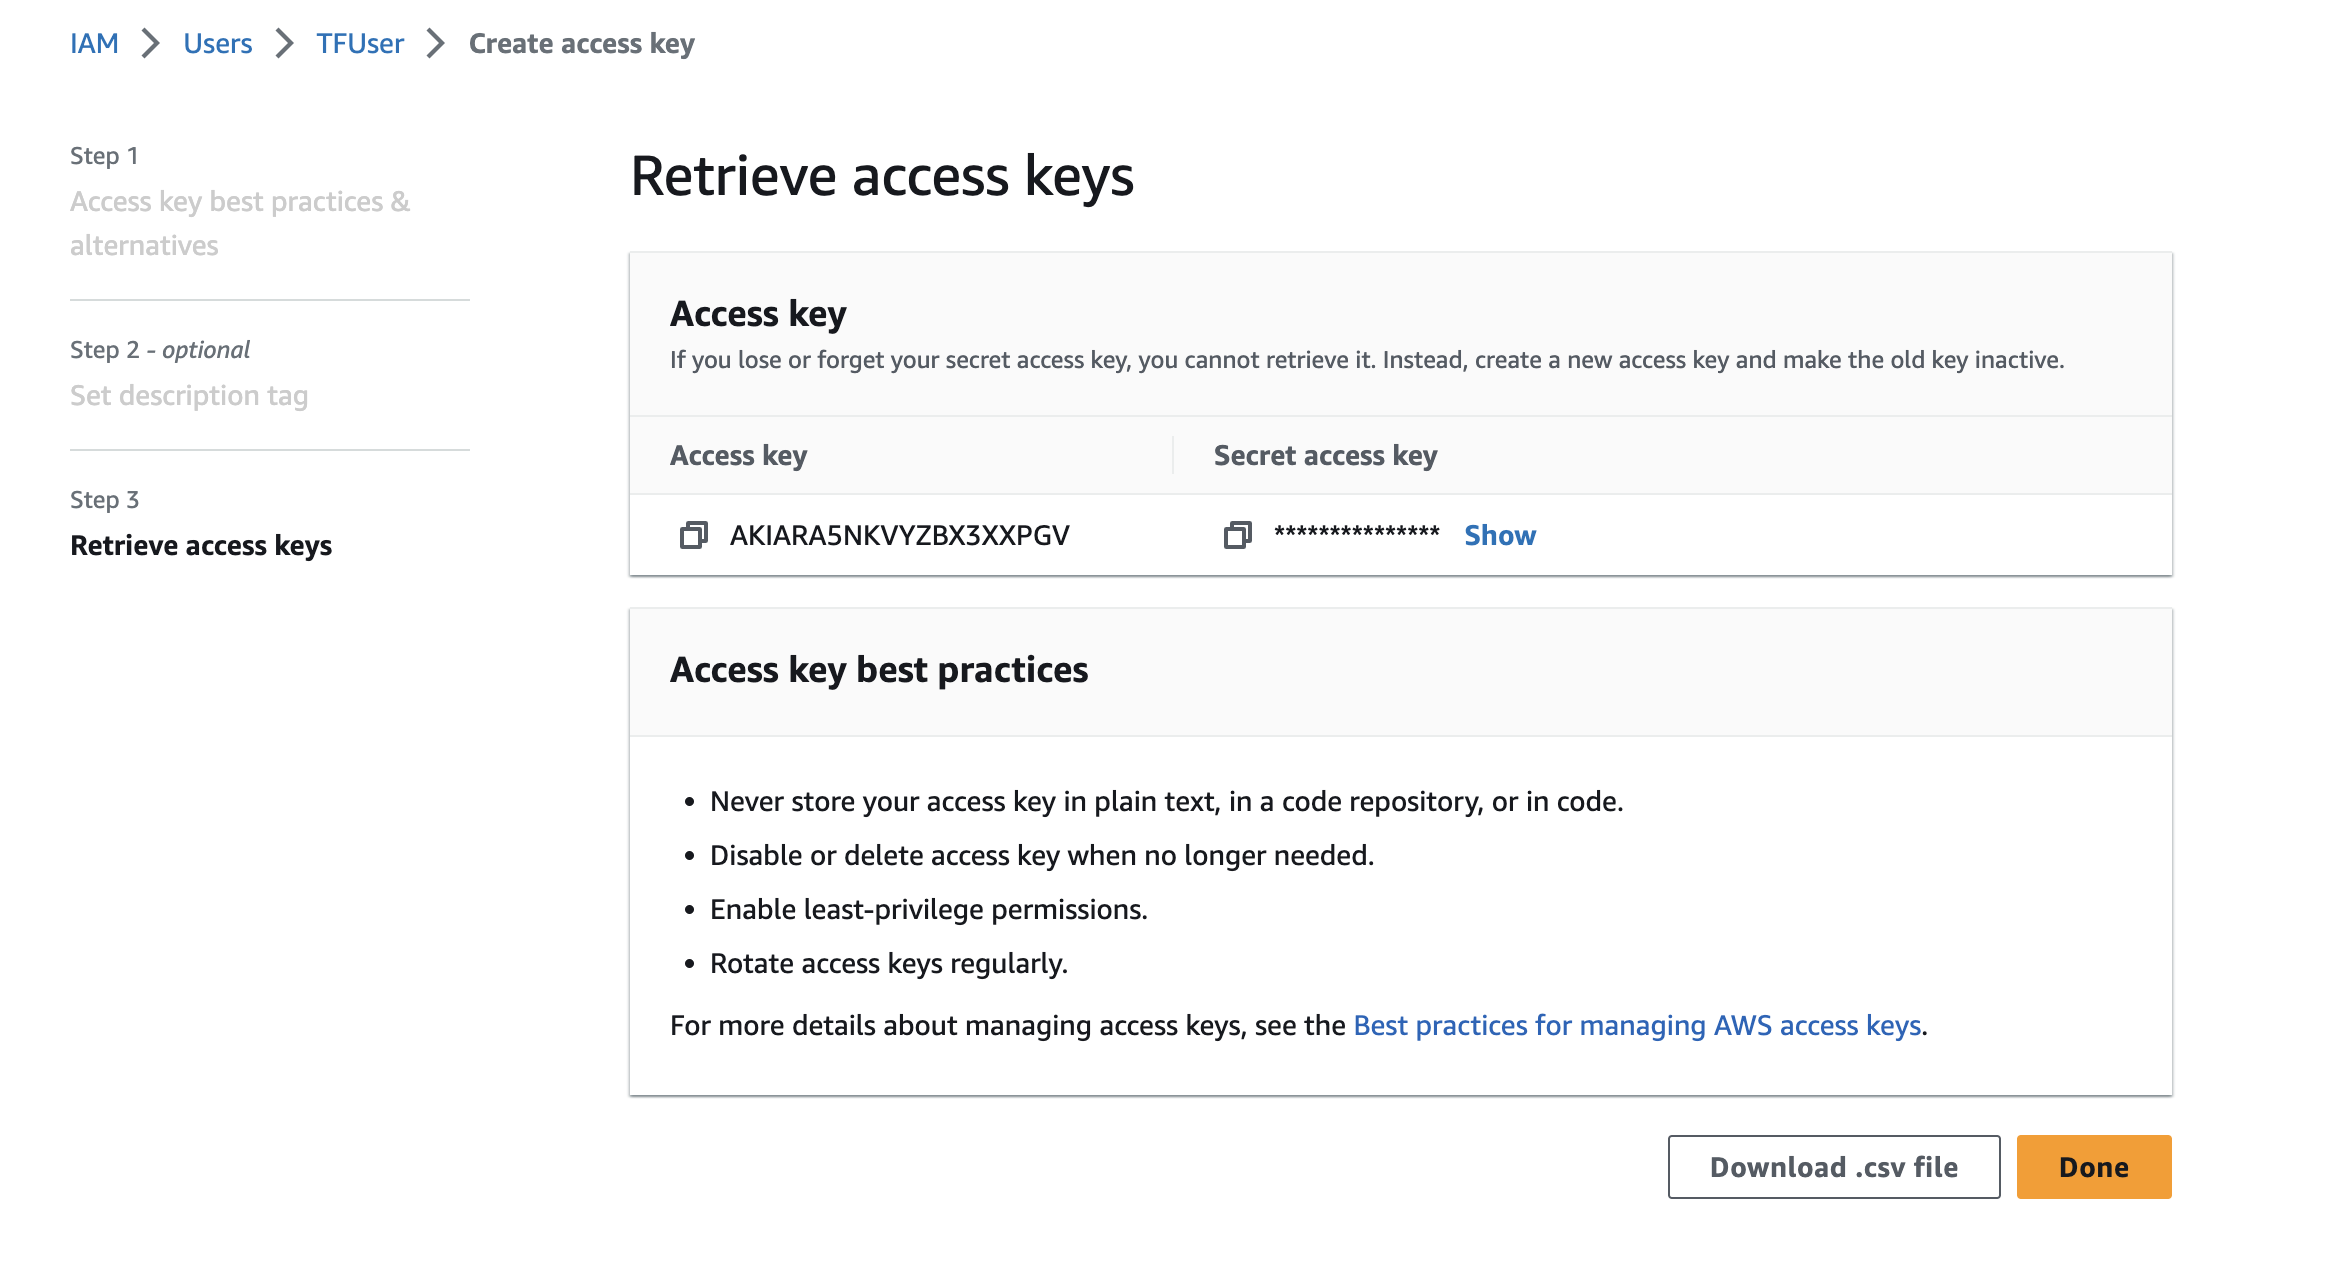
Click on the user you just made and select Security credentials.
Scroll down until you see Access Keys; select Create access key
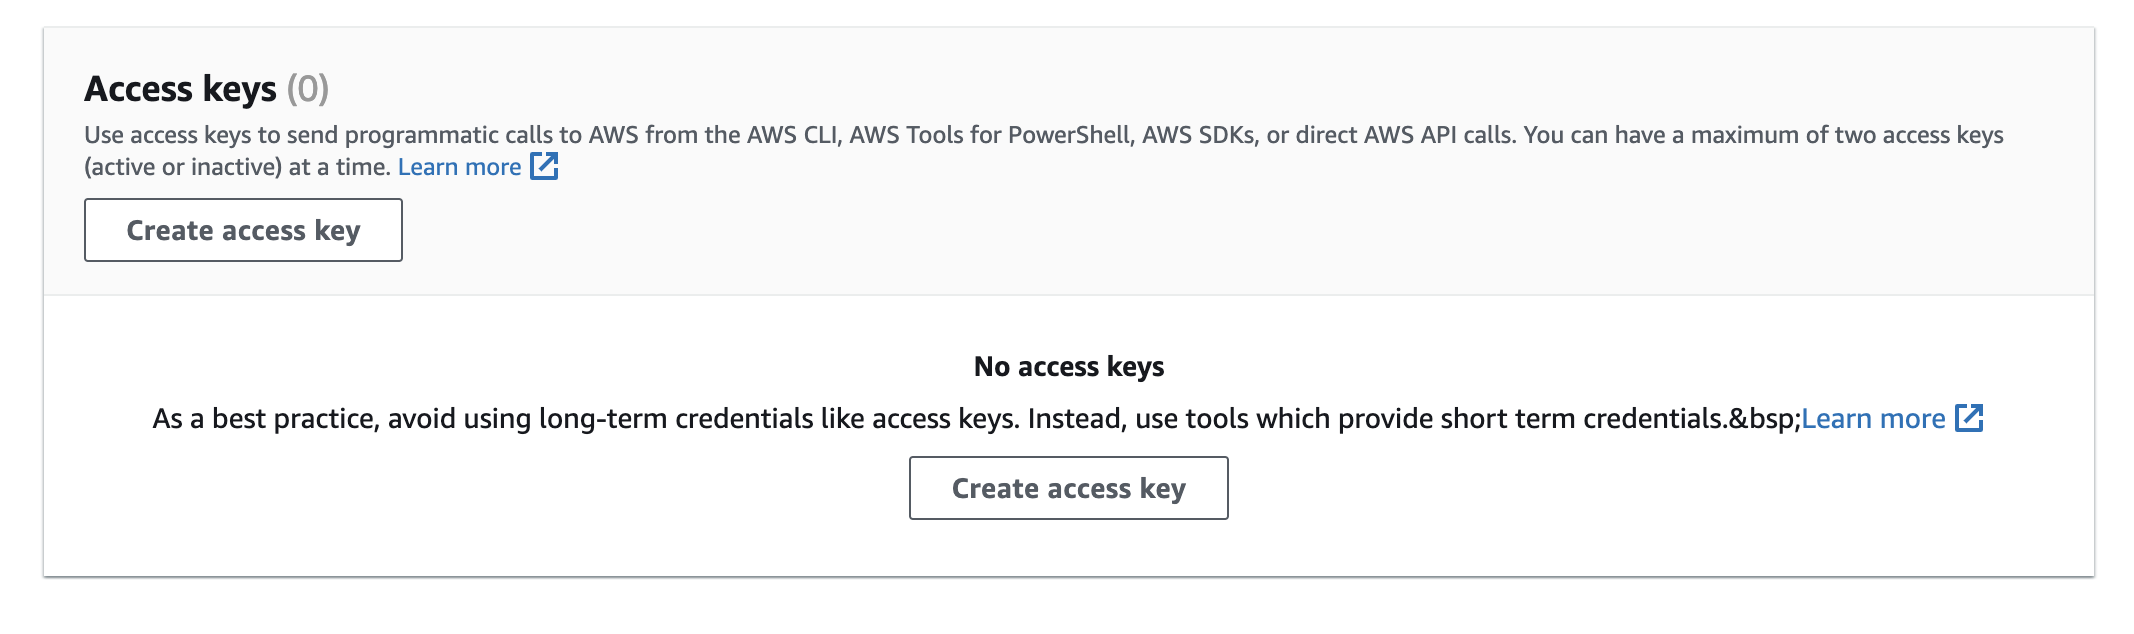
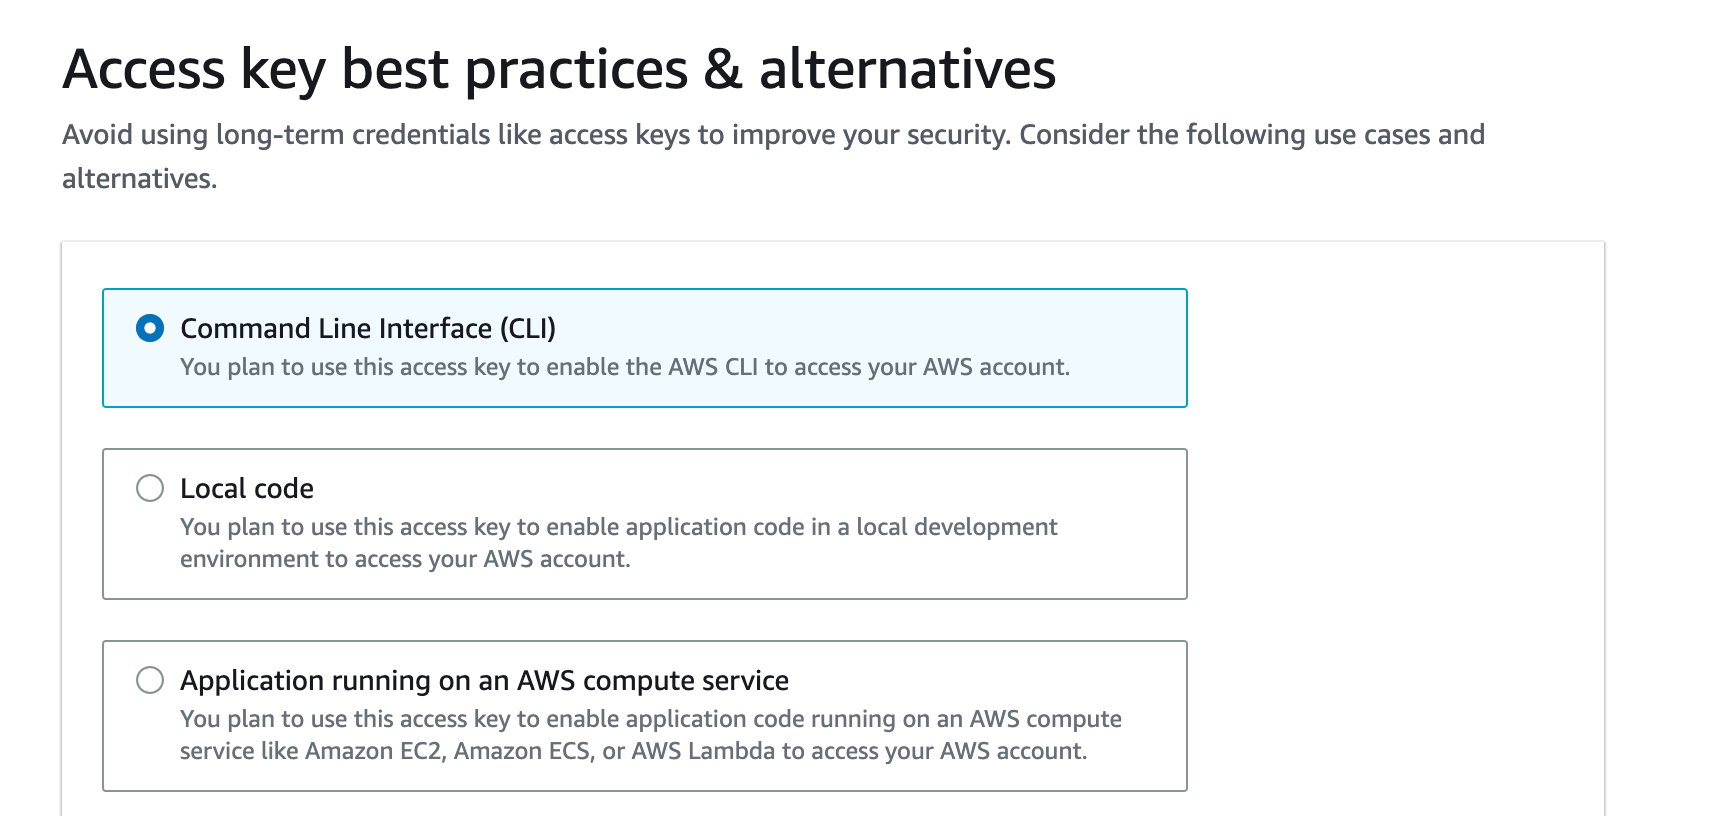
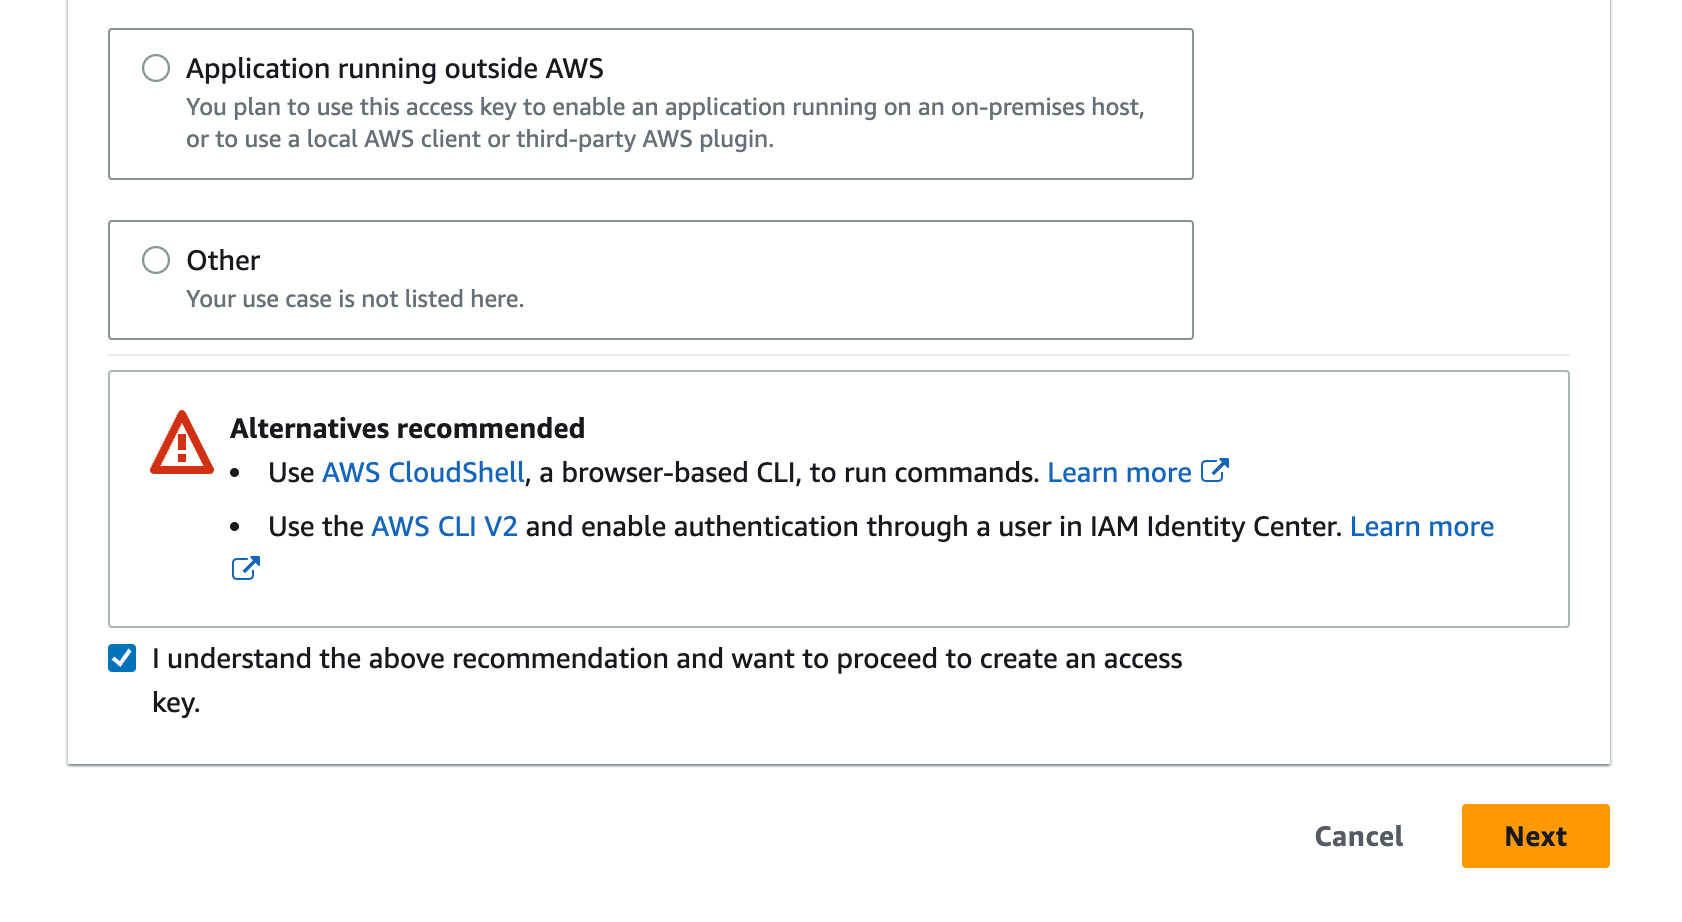
Select Command Line Interface, scroll down, check the box for "I understand..." and click next.
Select Create access key
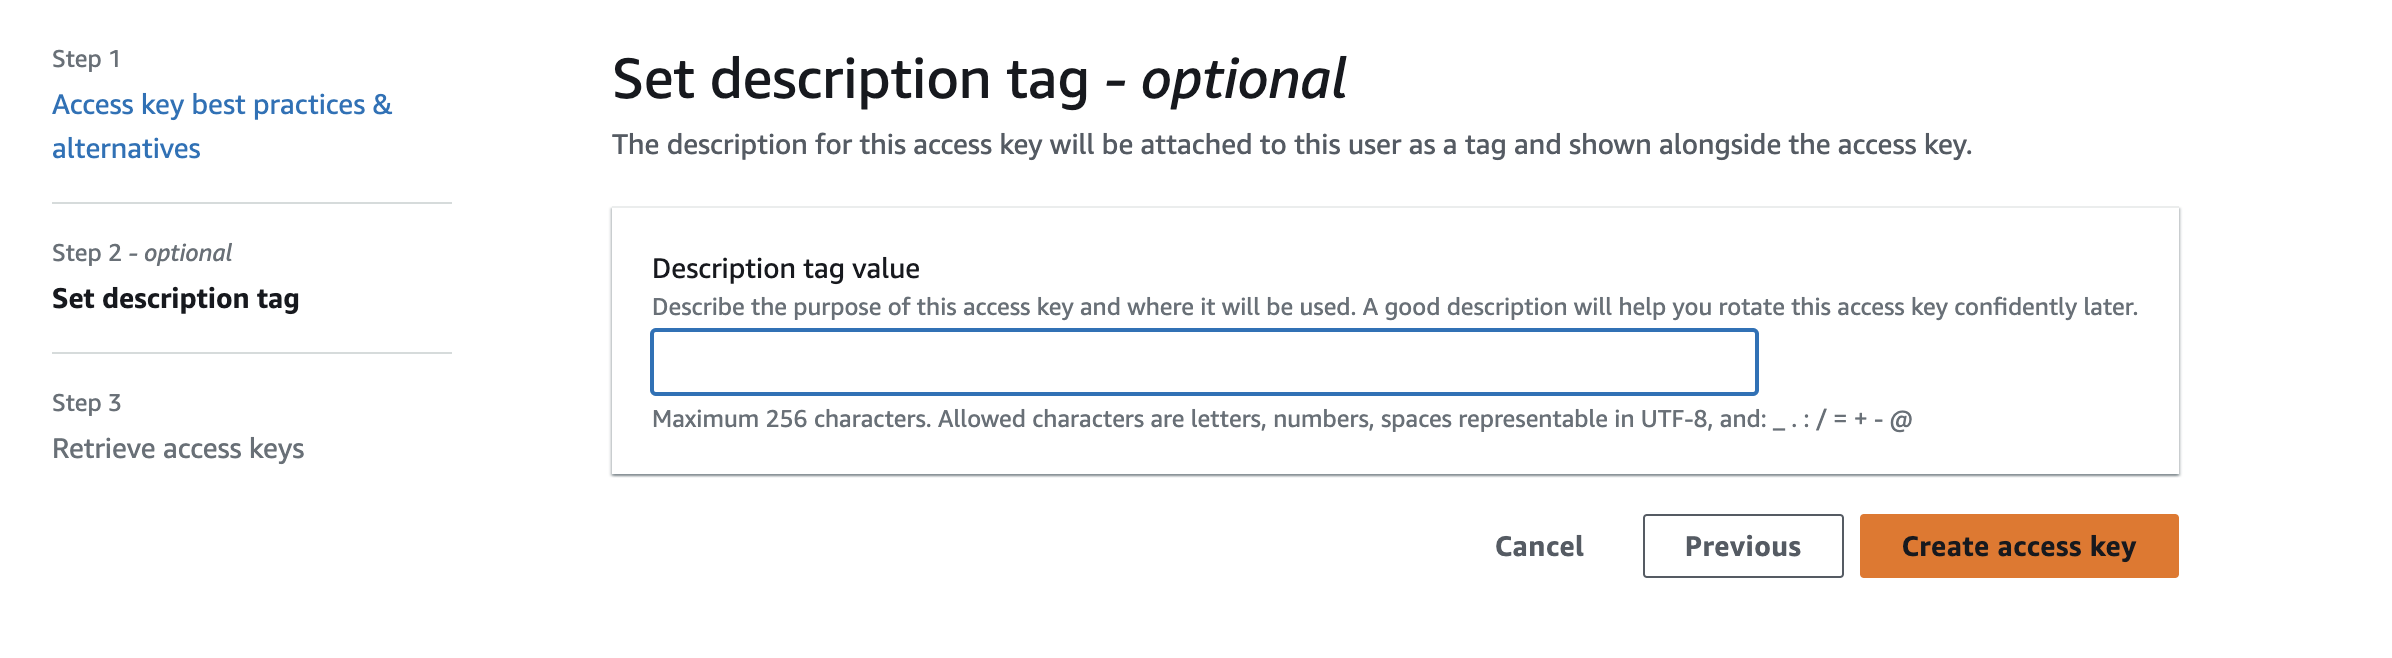
Now you should be able to retrieve your keys.
Be sure to download the .csv file. This is the ONLY chance you will have to access to the Secret Key, if you don't take it now and leave the page, you will have to go through all the steps again.
.aws Directory
Once you have downloaded your credentials, go find them and then go into you .aws directory.
You can find it hidden in your home directory - assuming you've setup AWS CLI.
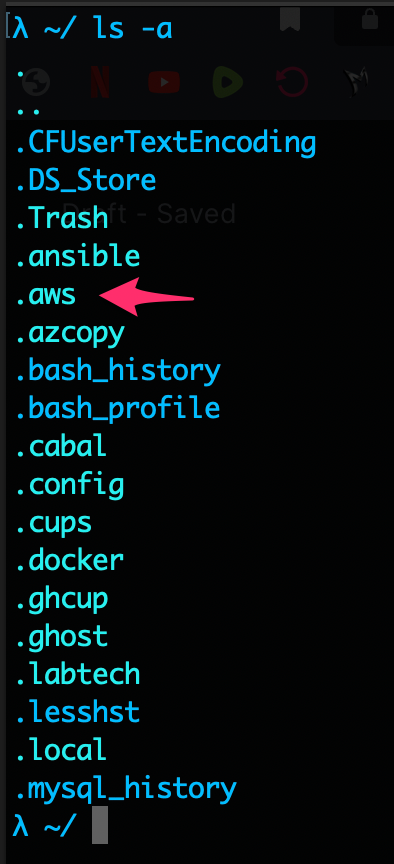
Go into the .aws directory and open the config file. Put you're access keys in here in the following format.
[profile tf_user]
aws_access_key_id = access_key
aws_secret_access_key = secret_access_key
The keys are now associated with the profile tf_user. Terraform will use the keys associated with this profile to make API calls to AWS.
Creating a Role
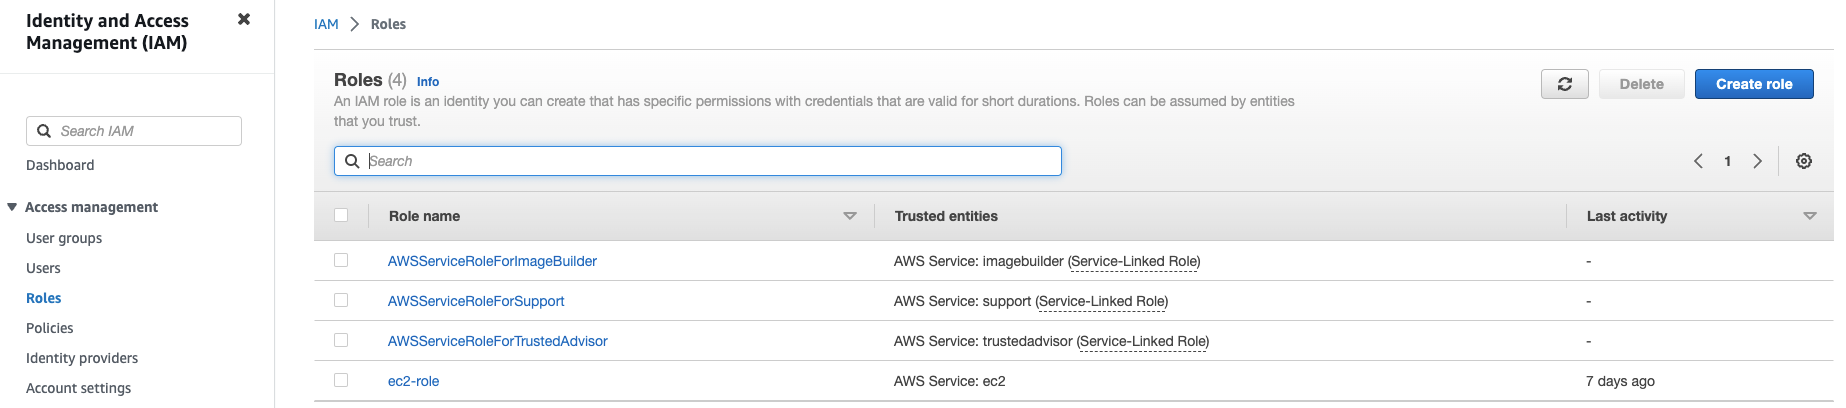
Back in AWS IAM management, select Roles and click on Create role
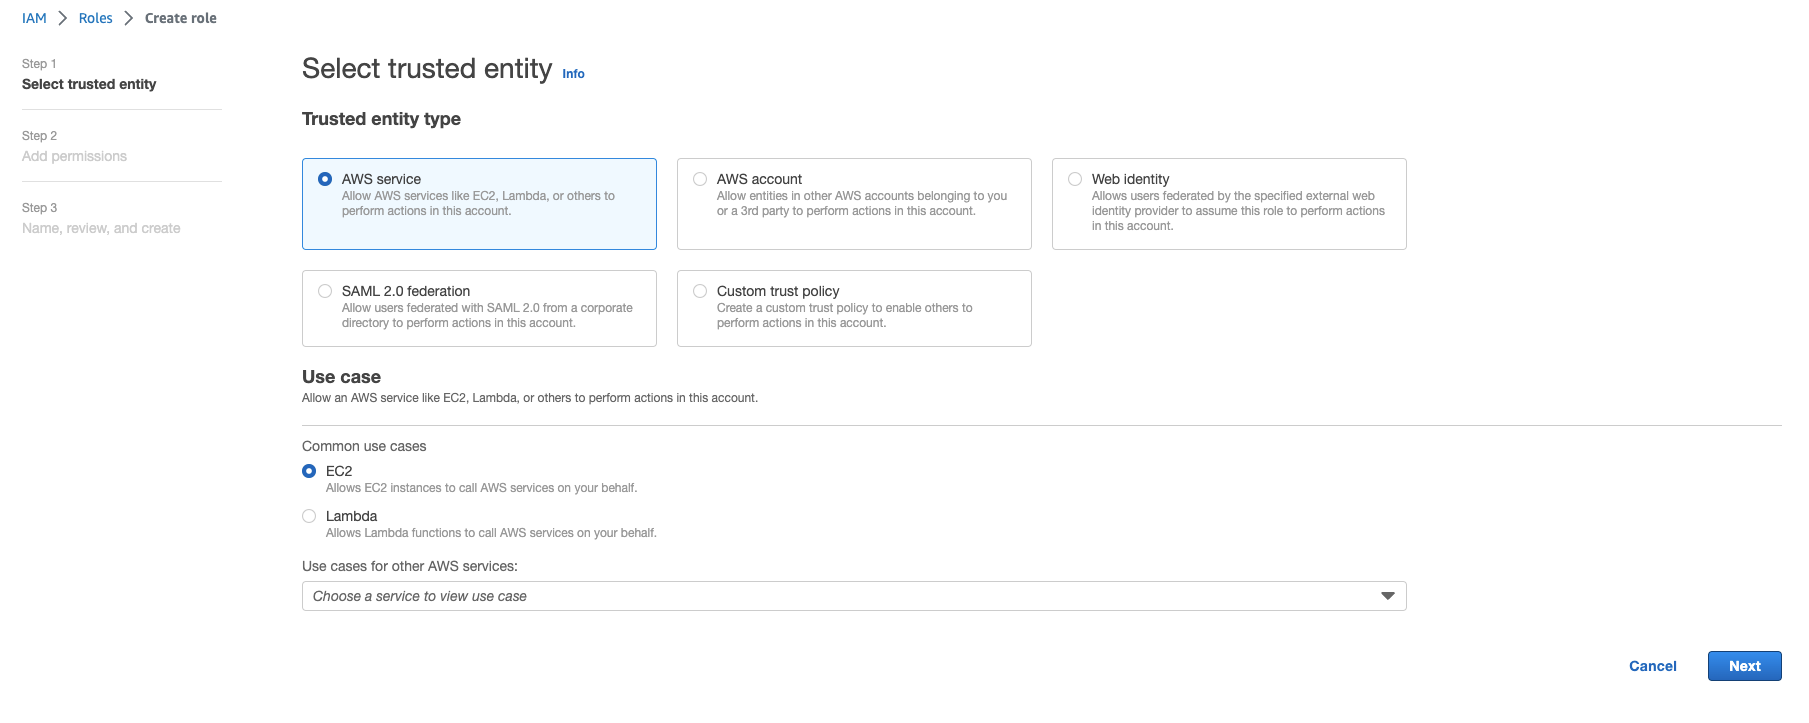
Select AWS service and then for use cases, select EC2
Select Create policy
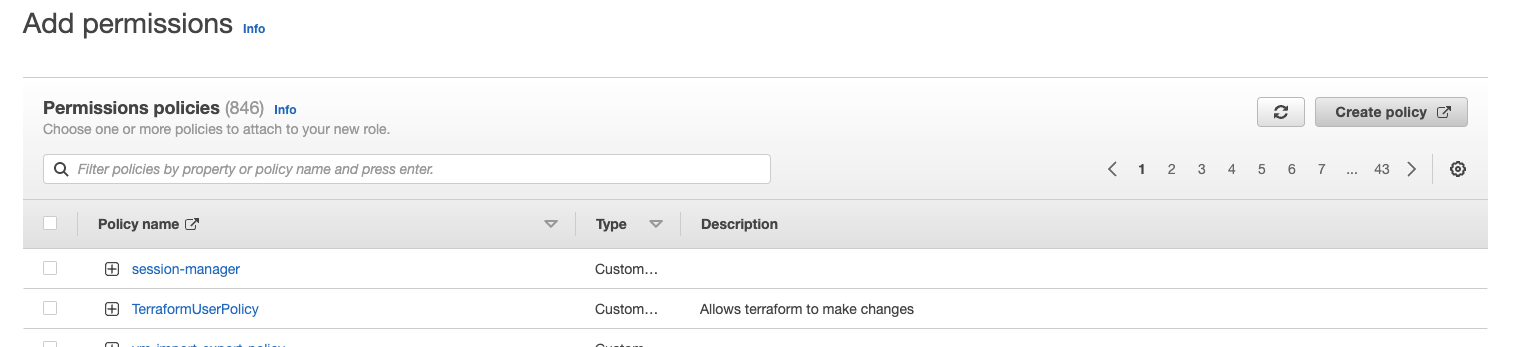
Click on JSON to see the policy editor
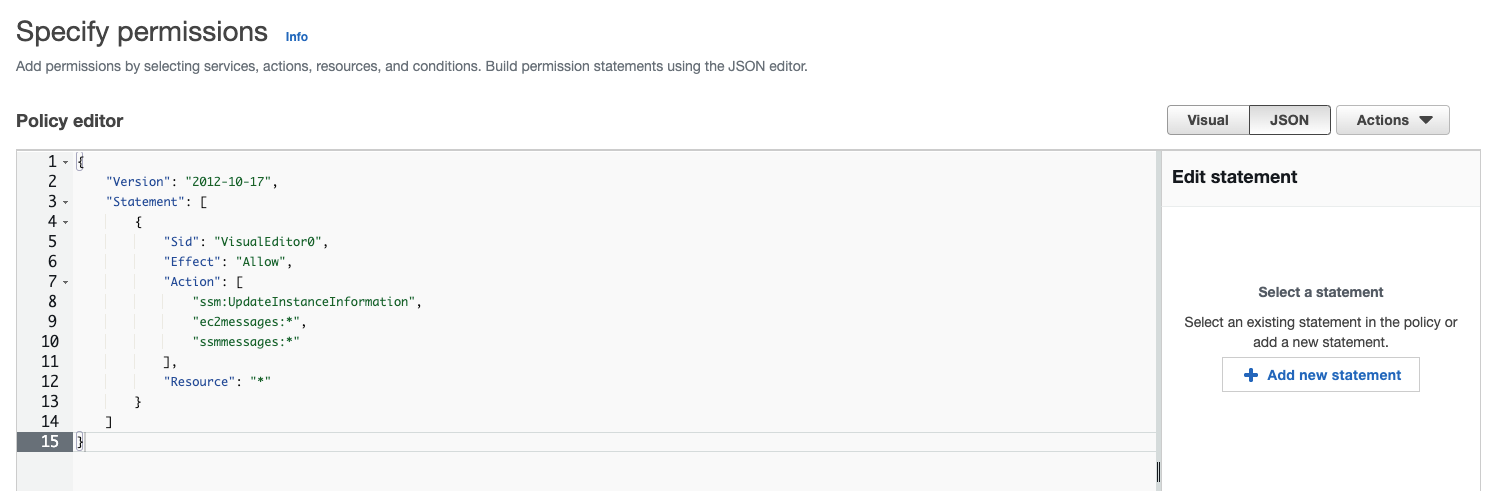
Copy and paste this policy and click next
{
    "Version": "2012-10-17",
    "Statement": [
        {
            "Sid": "VisualEditor0",
            "Effect": "Allow",
            "Action": [
                "ssm:UpdateInstanceInformation",
                "ec2messages:*",
                "ssmmessages:*"
            ],
            "Resource": "*"
        }
    ]
}
Give the policy a name, something like "session-manager" and click Create policy.
Navigate back to the Add permissions step in the role creation and select the policy you just made.
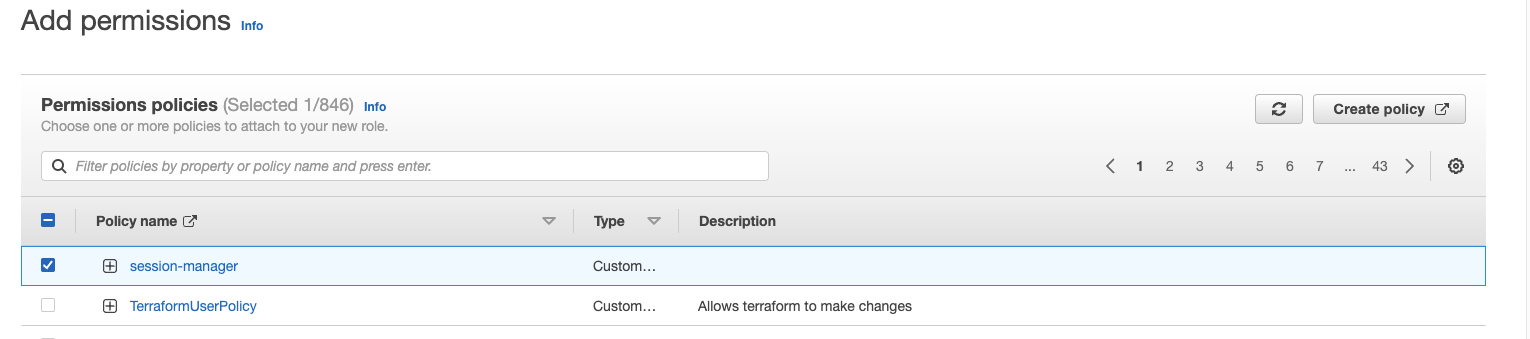
Select next, call it "ec2-role"and click Create role.
The purpose of this role is to allow you access your bastion instance - or any instance with an SSM agent running - through the AWS console.
AWS supplied linux AMIs typically have an SSM agent running. So long as your instance assumes this role you can access from the console.
Unfortunately, we can't use session manager on AMIs from the AWS marketplace, which is where we get out Kali machine from.
Instead, we're going to tunnel into the Kali using the bastion server.
Step 2: Terraform Code
I'll be referencing the files on github. Feel free to steal it if it helps you follow along.
backend.tf
To get started with Terraform you need a backend.tf and a provider.tf.
terraform {
  backend "s3" {
    bucket  = "hackers-playground"
    key     = "hp.tfstate"
    region  = "eu-west-1"
    profile = "tf_user"
  }
}
backend.tf
Terraform manages a great deal of resources, which it keeps track of using a state file.
The backend.tf is a small file that describes where the state files will be stored. Since we're using AWS, it makes sense for the files to be stored in an S3 bucket.
You can call your bucket and key whatever you want, so long as you can keep track of them. In this project, they are names "hackers-playground" and "hp.tfstate", respectively.

bucketrefers to the name of the S3 bucketkeyrefers to the name of the state file.profileshould look familiar. We made one earlier in the .aws folder Terraform uses the keys associated to the tf_user profile to make API calls to the AWS account.
provider.tf
Terraform is platform agnostic. It can be used to generate infrastructure for many platforms like AWS, Google Cloud Platform, Microsoft Azure, etc...
The provider is a plugin that lets you specify which platform you want to use. Since we're deploying to AWS, we want the corresponding provider.
provider "aws" {
  region  = "eu-west-1"
  profile = "tf_user"
}
provider.tf
vpc.tf
Before we setup out machine, we need to setup our virtual private cloud (VPC).

We're going to create a VPC with 2 subnets, 2 route tables (RT), 1 NAT Gateway (NAT), and an Internet Gateway (IG).
# ------------------ VPC

data "aws_availability_zones" "azs" {
  state = "available"
}

resource "aws_vpc" "sandbox_vpc" {
  cidr_block           = "10.0.0.0/16"
  enable_dns_support   = true
  enable_dns_hostnames = true
  tags = {
    Name = "sandbox-vpc-1"
  }
}
Here, I'm creating a VPC (sanbox-vpc-1) with the CIDR block 10.0.0.0/16.
# ------------------ Subnets
resource "aws_subnet" "private_subnet" {
  availability_zone = element(data.aws_availability_zones.azs.names, 0)
  vpc_id            = aws_vpc.sandbox_vpc.id
  cidr_block        = "10.0.1.0/24"
  tags = {
    Name = "private-subnet-1"
  }
}

resource "aws_subnet" "public_subnet" {
  availability_zone = element(data.aws_availability_zones.azs.names, 0)
  vpc_id            = aws_vpc.sandbox_vpc.id
  cidr_block        = "10.0.2.0/24"
  tags = {
    Name = "public-subnet-1"
  }
}
Here, I'm defining the subnets.
The two subnets, public and private, will each have a RT associated with it, which will be responsible for directing traffic between them.
# ------------------ Route Tables (Public)

resource "aws_route_table" "public_rt" {
  vpc_id = aws_vpc.sandbox_vpc.id

  route {
    cidr_block = "0.0.0.0/0"
    gateway_id = aws_internet_gateway.sandbox_vpc_igw.id
  }
  lifecycle {
    ignore_changes = all
  }
  tags = {
    "Name" = "public-rt-1"
  }

  depends_on = [
    aws_internet_gateway.sandbox_vpc_igw
  ]
}

resource "aws_main_route_table_association" "public_main_rt_association" {
  vpc_id         = aws_vpc.sandbox_vpc.id
  route_table_id = aws_route_table.public_rt.id
}

resource "aws_route_table_association" "public_rt_association" {
  subnet_id      = aws_subnet.public_subnet.id
  route_table_id = aws_route_table.public_rt.id
}
Public Route Table
The public RT will direct any traffic from the public subnet destined for the internet towards the internet gateway.
Anything inside the public subnet will have access to the internet.
# ------------------ Route Tables (Private)

resource "aws_route_table" "private_rt" {
  vpc_id = aws_vpc.sandbox_vpc.id

  route {
    cidr_block     = "0.0.0.0/0"
    nat_gateway_id = aws_nat_gateway.sandbox_vpc_ng.id
  }

  lifecycle {
    ignore_changes = all
  }

  tags = {
    "Name" = "private-rt-1"
  }

  depends_on = [
    aws_nat_gateway.sandbox_vpc_ng
  ]
}

resource "aws_route_table_association" "private_rt_association" {
  subnet_id      = aws_subnet.private_subnet.id
  route_table_id = aws_route_table.private_rt.id
}
Private Route Table
You don't want anything in the private subnet to have direct access to the internet.
Instead, the private RT directs traffic destined for the internet toward the NAT gateway located in the public subnet.
NAT stands for network address translation. It's the same technology your home router uses.
Simply put, it translate a private ip to a public one in order to make request to the internet.
Since our Kali is going to be in a private subnet, it won't have a public ip, and won't be able to access the internet on it's own. The same way your computer at home can't access the internet without a router.
The NAT gateway will act like the Kali machine's 'router' and make requests to the internet on it's behalf.
# ------------------ Internet & NAT Gatways

resource "aws_internet_gateway" "sandbox_vpc_igw" {
  vpc_id = aws_vpc.sandbox_vpc.id
  tags = {
    Name = "sandbox-vpc-igw"
  }
}

resource "aws_eip" "nat_ip" {
  vpc = true
  tags = {
    Name = "sandbox-nat-eip"
  }
}

resource "aws_nat_gateway" "sandbox_vpc_ng" {
  connectivity_type = "public"
  allocation_id     = aws_eip.nat_ip.id
  subnet_id         = aws_subnet.public_subnet.id

  depends_on = [aws_internet_gateway.sandbox_vpc_igw]
}
Internet Gateway and NAT Gateway
In order to do that, the NAT gateway will need to be allocated an public ip, AKA elastic ip.
ec2.tf
The ec2.tf is where we configure the Kali and Bastion instances.
# ---------- Linux AMI, Role, Key Pair
data "aws_ssm_parameter" "linuxAMI" {
  name = "/aws/service/ami-amazon-linux-latest/amzn2-ami-hvm-x86_64-gp2"
}
This set of code deals with getting the AMI for the bastion.
data "aws_iam_role" "ec2-role" {
  name = "ec2-role"
}

resource "aws_iam_instance_profile" "session_manager" {
  name = "session_manager"
  role = data.aws_iam_role.ec2-role.name
}
The data call in the code above is for retrieving the role that we made earlier.
The role is baked into the instance profile which is later associated with the bastion instance.
resource "aws_key_pair" "instance_key" {
  key_name   = "hackers-playground"
  public_key = file("~/.ssh/hackers-playground.pub")
}
This segment of code creates a key-pair resource which we associate with both instances.
ssh-keygen -t rsa
Enter the command above inside your .ssh directory and you will be prompted to generate a key-pair. Give it a name.
The result should be key_name and key_name.pub
Remember to give your private key the correction permissions with
chmod 400 key_name
This should make it useable with the ssh command.
public_key = file("~/.ssh/hackers-playground.pub") this line of code reference the public key that you made.
This will allows us to SSH into the bastion and tunnel into the Kali.
# ---------- Bastion
resource "aws_instance" "bastion" {
  ami                         = data.aws_ssm_parameter.linuxAMI.value
  iam_instance_profile        =   aws_iam_instance_profile.session_manager.name
  instance_type               = "t2.micro"
  key_name                    = aws_key_pair.instance_key.key_name
  associate_public_ip_address = true
  subnet_id                   = aws_subnet.public_subnet.id
  vpc_security_group_ids      = [aws_security_group.bastion_instance_sg.id]
  tags = {
    Name = "bastion"
  }
  depends_on = [aws_route_table_association.public_rt_association]
}

resource "aws_security_group" "bastion_instance_sg" {
  name        = "bastion-instance-sg"
  description = "Allow TCP/8080 & TCP/22"
  vpc_id      = aws_vpc.sandbox_vpc.id
  ingress {
    description = "Allow 22"
    from_port   = 22
    to_port     = 22
    protocol    = "tcp"
    cidr_blocks = ["0.0.0.0/0"]
  }
  ingress {
    description = "Allow anyone on port 8080"
    from_port   = 8080
    to_port     = 8080
    protocol    = "tcp"
    cidr_blocks = ["0.0.0.0/0"]
  }
  egress {
    from_port   = 0
    to_port     = 0
    protocol    = "-1"
    cidr_blocks = ["0.0.0.0/0"]
  }
}
This block of code configures the bastion and it's corresponding security group.
We need this instance to be publicly available for us to SSH onto, hence we associate it with a public ip.
The security group allows TCP traffic to connect to ports 22 and 8080, and allows all outgoing traffic.
# ---------- Kali
resource "aws_instance" "kali_vm" {
  ami                         = "ami-03a63adf60b12f091"
  iam_instance_profile        = aws_iam_instance_profile.session_manager.name
  instance_type               = "t2.micro"
  key_name                    = aws_key_pair.instance_key.key_name
  associate_public_ip_address = false
  vpc_security_group_ids      = [aws_security_group.kali_instance_sg.id]
  subnet_id                   = aws_subnet.private_subnet.id
  tags = {
    Name = "kali-vm-1"
  }
  depends_on = [aws_route_table_association.private_rt_association]
}

resource "aws_security_group" "kali_instance_sg" {
  name        = "kali-instance-sg"
  description = "Allow TCP/8080 & TCP/22"
  vpc_id      = aws_vpc.sandbox_vpc.id
  ingress {
    description = "Allow 22"
    from_port   = 22
    to_port     = 22
    protocol    = "tcp"
    cidr_blocks = ["10.0.2.0/24"]
  }
  ingress {
    description = "Allow anyone on port 8080"
    from_port   = 8080
    to_port     = 8080
    protocol    = "tcp"
    cidr_blocks = ["10.0.2.0/24"]
  }
  egress {
    from_port   = 0
    to_port     = 0
    protocol    = "-1"
    cidr_blocks = ["0.0.0.0/0"]
  }
}
Kali instance has a similar configuration. This time we're not giving it public ip and we're only allowing TCP traffic from the public subnet.
This will allow us to connect from the bastion.
That pretty much covers all the terraform code - don't worry about the variables.tf, it doesn't do anything.
Terraform Apply
Run a terraform init in the same directory with the code.
If you've done things correctly then you should be seeing this:
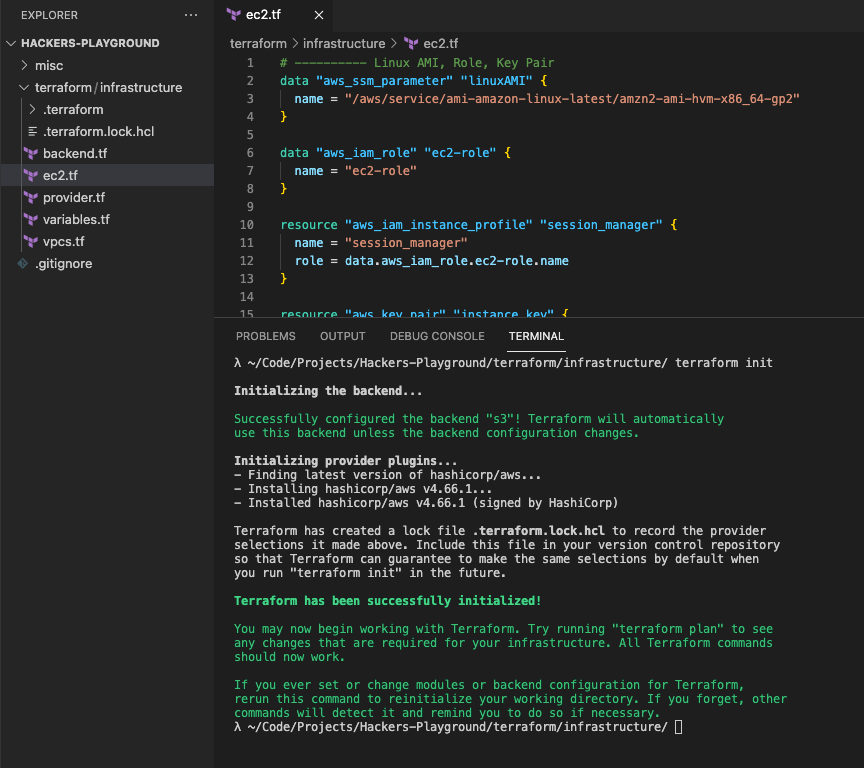
Terraform has successfully configure your s3 from the backend.tf
Check the code with terraform plan
This will show you the changes that your code will make. It's also a good way to check for errors.
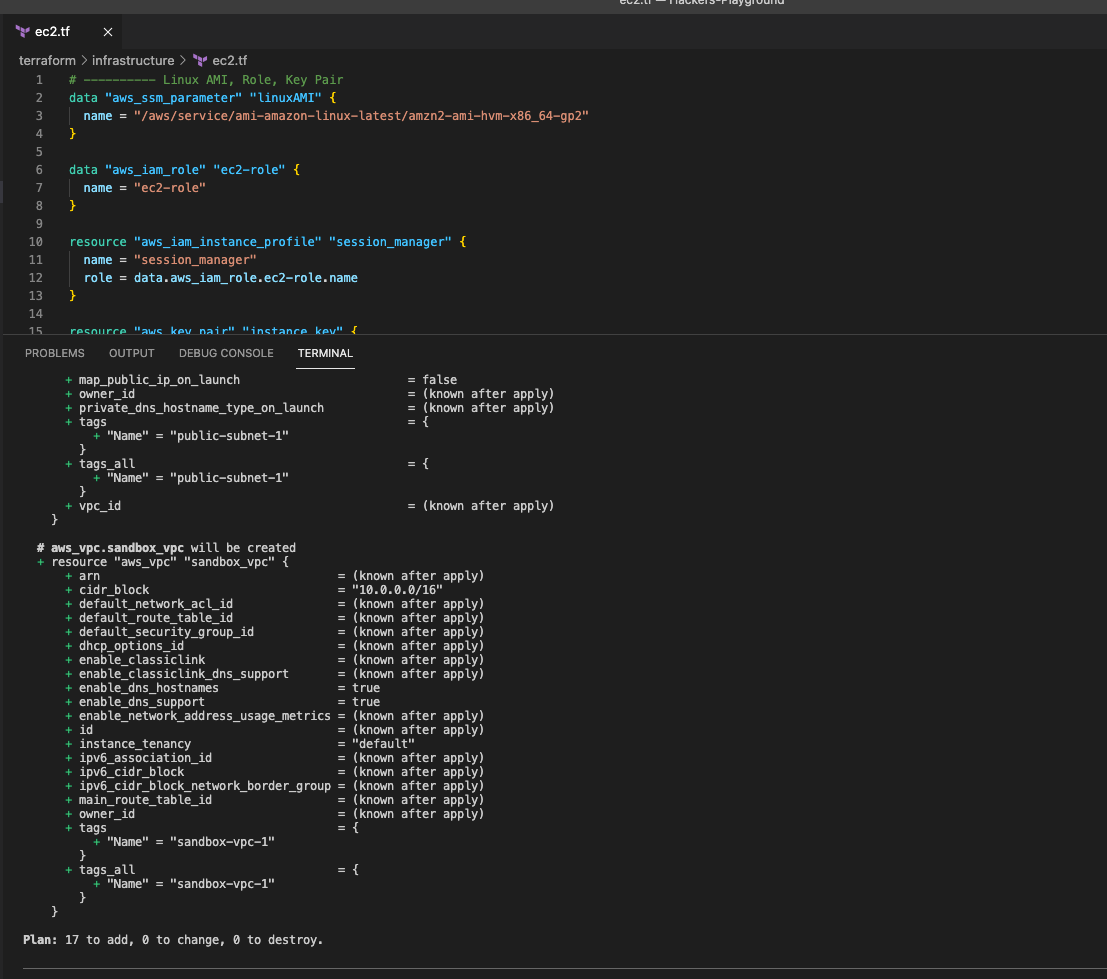
Looks good!
Now create the infrastructure with terraform apply --auto-approve
This will take a minute or two because it has to create everything, so now is a good time to grab some coffee.
If you see this
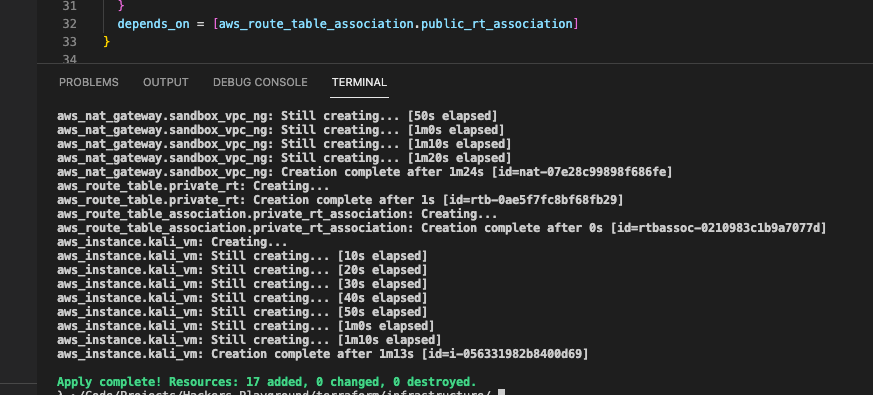
Then it was a success!
Now all that's left is to access the Kali machine.
Note: You can remove everything with terraform destroy --auto-approve
Step 3: SSH Tunneling
You'll need the public ip of your bastion instance for this to work.
To find it, go to the EC2 service on AWS

After selecting the bastion instance, select Connect on the top right
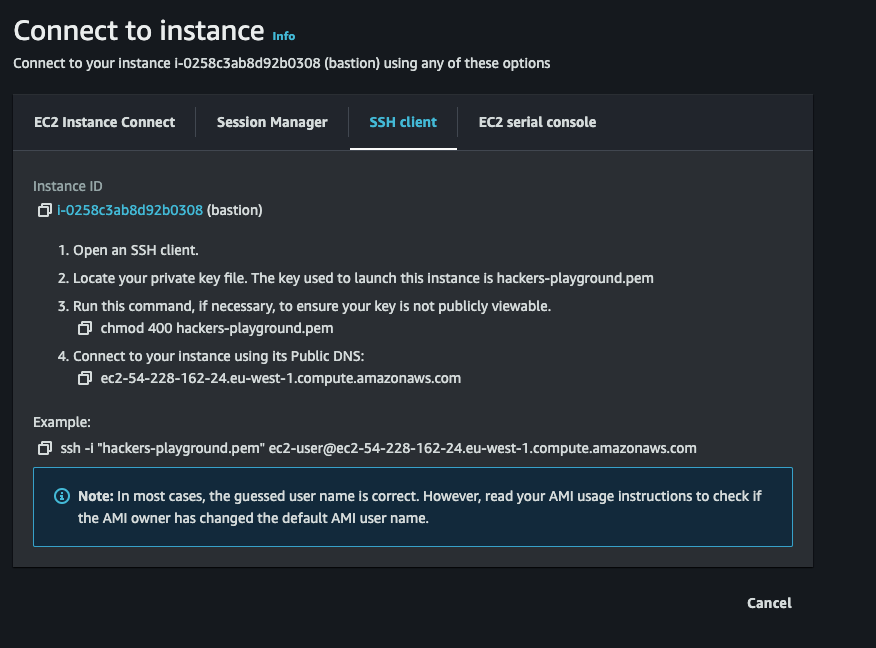
Click SSH client and copy the point 4, the public DNS name.
SSH Agent
Now that you have you have your endpoint, you can use your private key to connect to the bastion via ssh.
The problem is you will also need the same private key to ssh into your Kali machine.
You could use scp to copy the key into your bastion, but that's a little troublesome and not very secure.
We're going to use ssh agent instead. Think of it like a keychain that you take with you whenever you connect to something via ssh.
To add the private key to the keychain us this command
ssh-add private_key
Check which keys you have using ssh-add -l

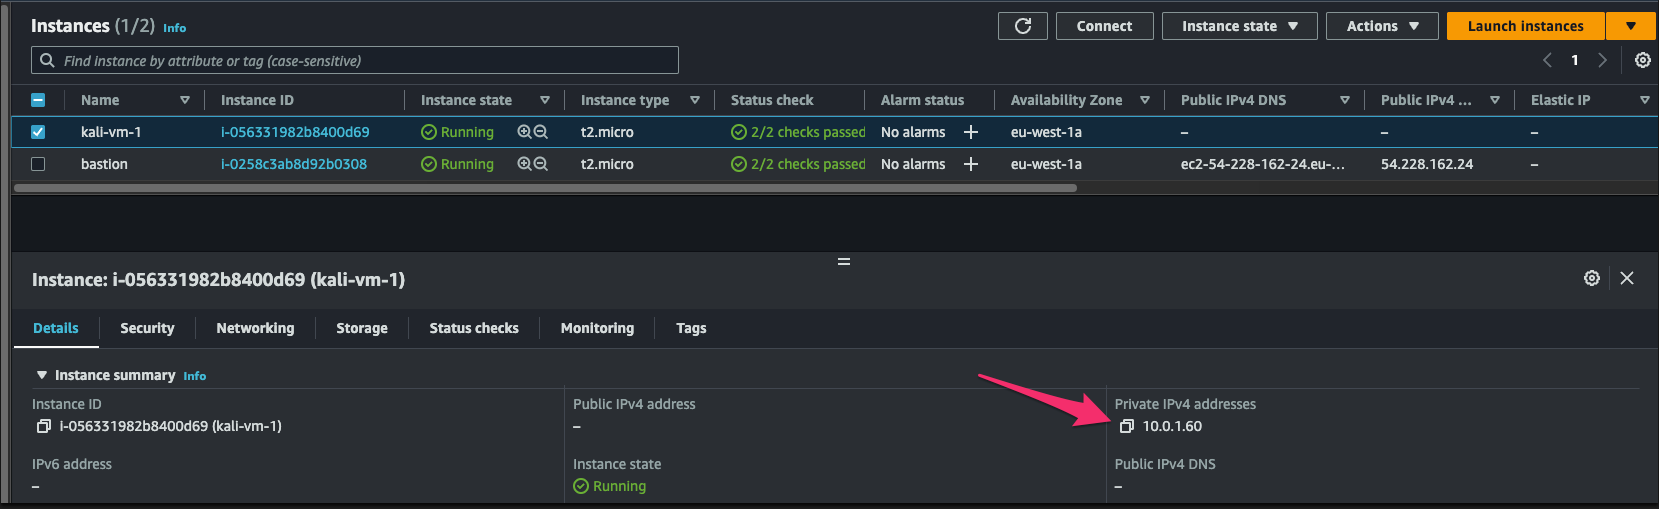
Once you've added your key this next command will link port
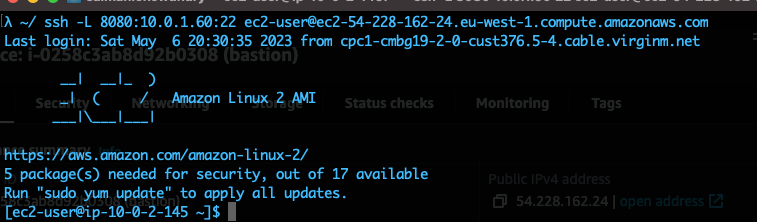
ssh -L 8080:kali_private_ip:22 ec2-user@bastion_DNS_name
The command will sync your local port 8080 (using something that isn't a commonly used port) to the Kali port 22.
Go find the private ip for the Kali in the AWS console.
Running the command should result in what looks to be a normal ssh shell to the bastion.
Open up a second terminal and type: ssh kali@127.0.0.1 -p 8080
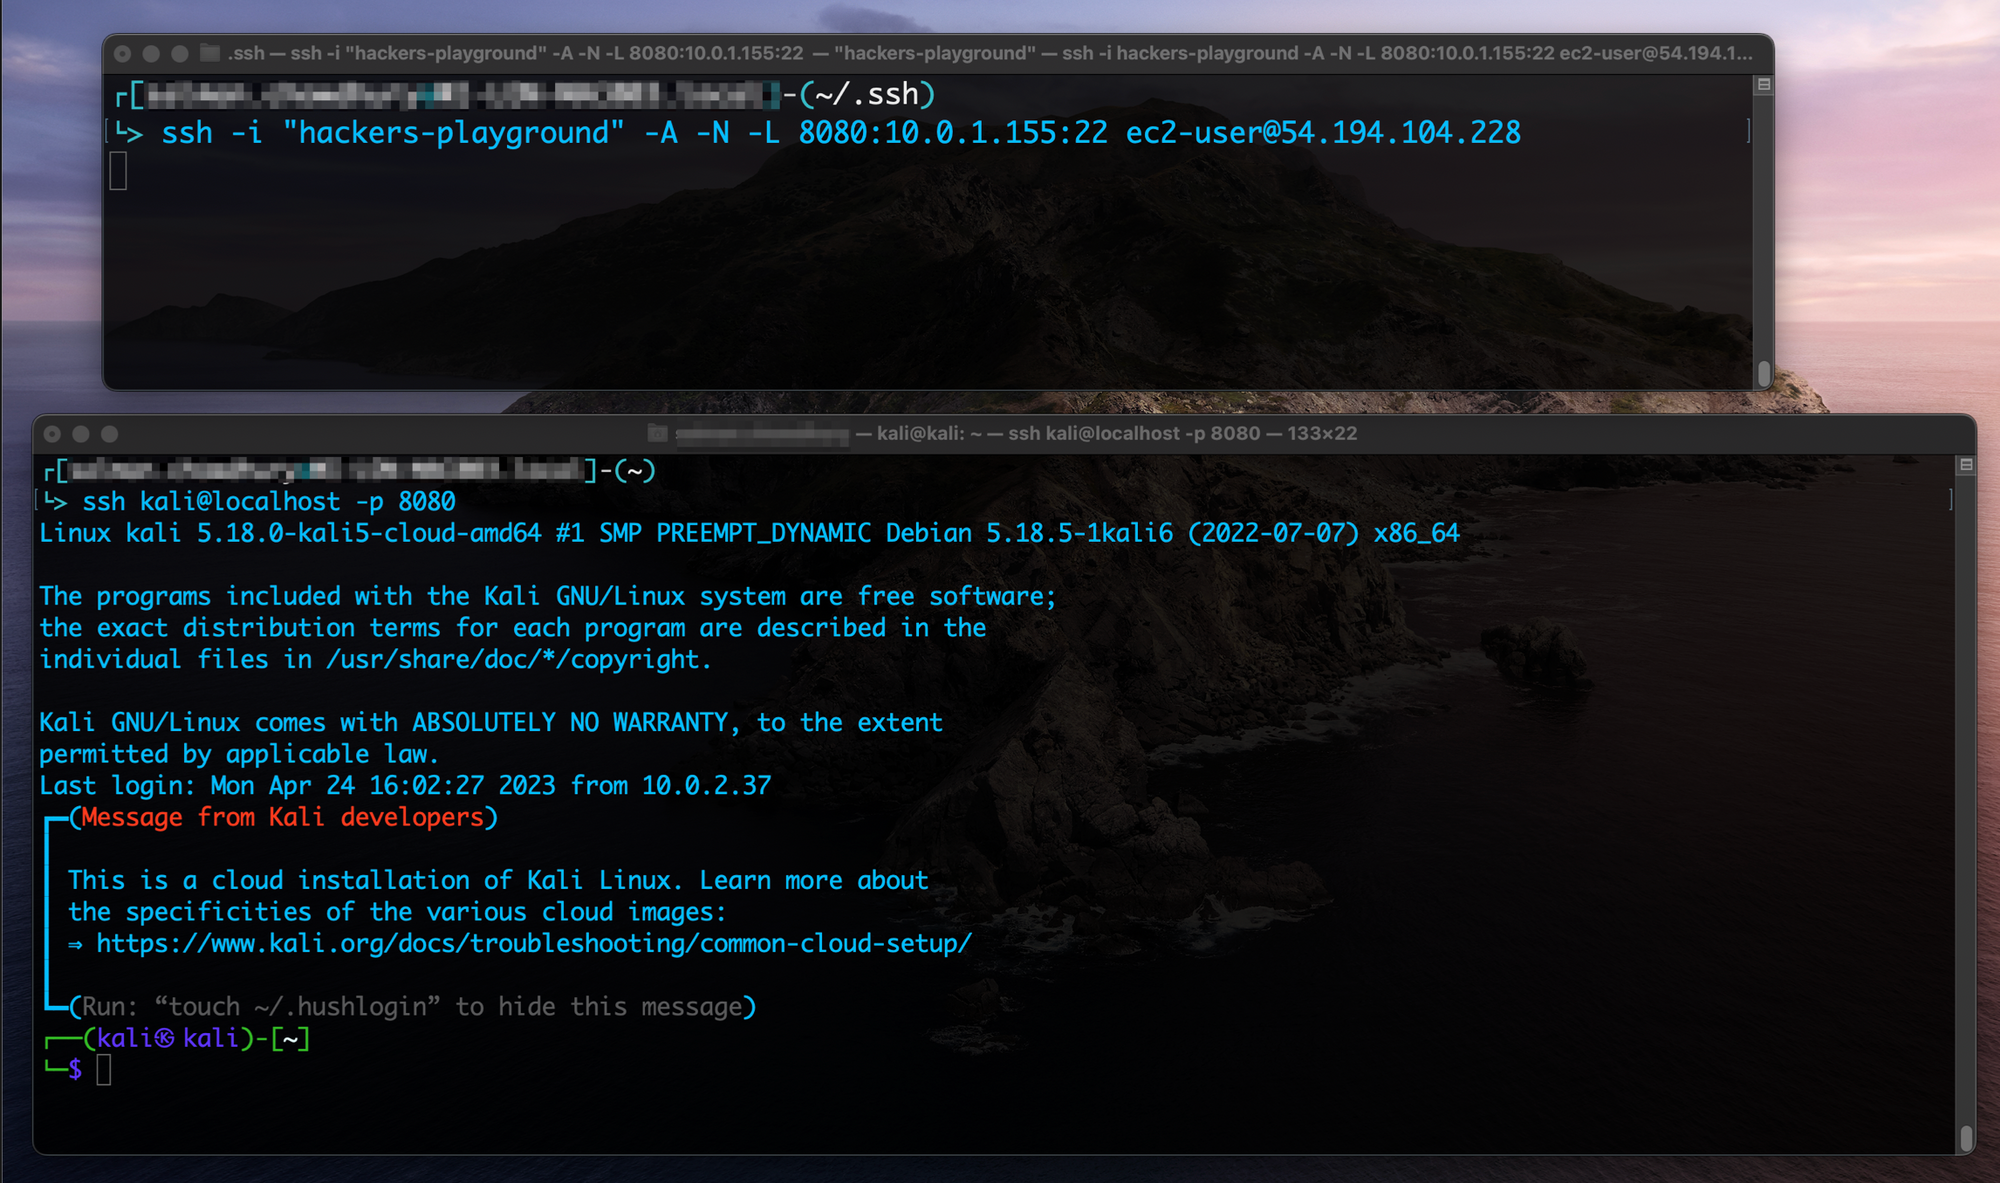
Great! We've finally made it into our Kali machine! Now to test that it can access the internet you can just ping google.
Our First Challenge: Over The Wire!
But I wanted to go a step further and try out to complete the most basic challenge on overthewire.org - a website with fun, practical security challenges. Great if you're just starting out. I highly recommend it!
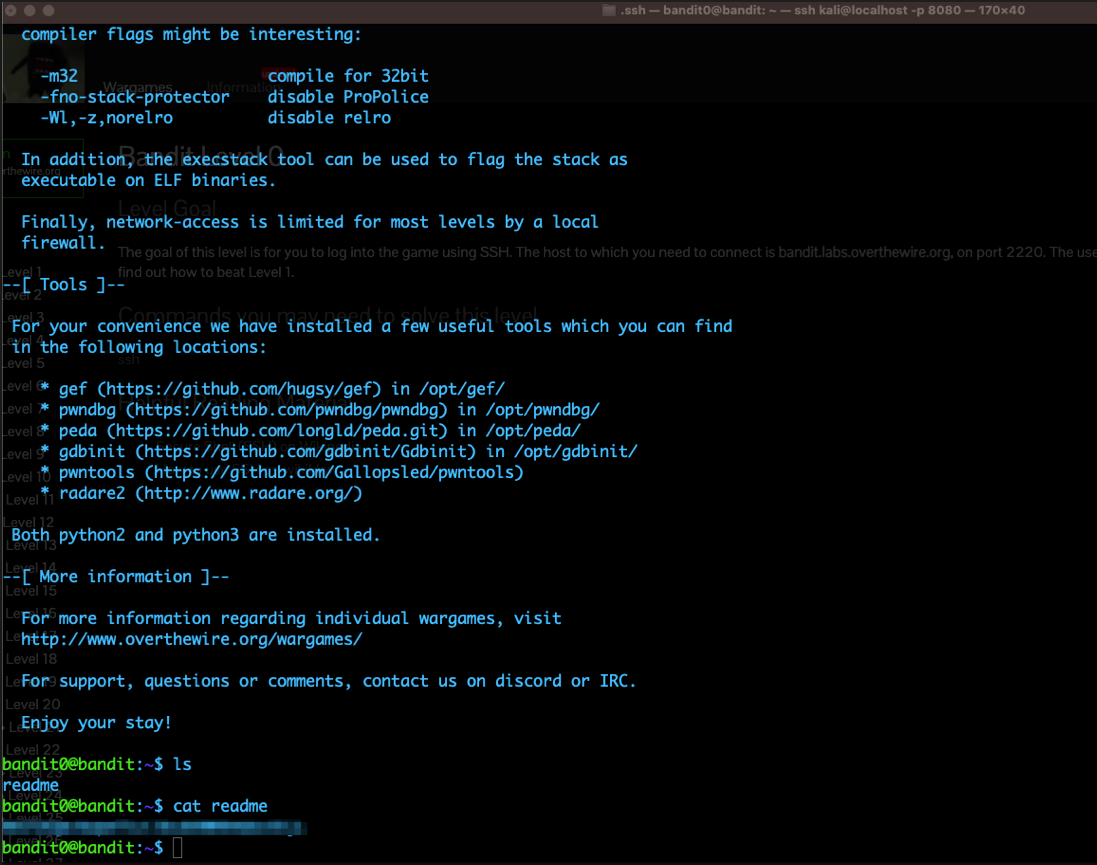
We're going to attempt the first challenge: ssh onto their server, cat the readme, and grab the flag.
At this point, we're experts on ssh-ing so this should be a easy. We have to ssh onto the host bandit.labs.overthewire.org, on port 2220, as the user bandit0 (zero at the end - sorry about the weird font) and enter the password, which is the same as the username.
On your machine, type ssh bandit0@bandit.labs.overthewire.org -p 2220
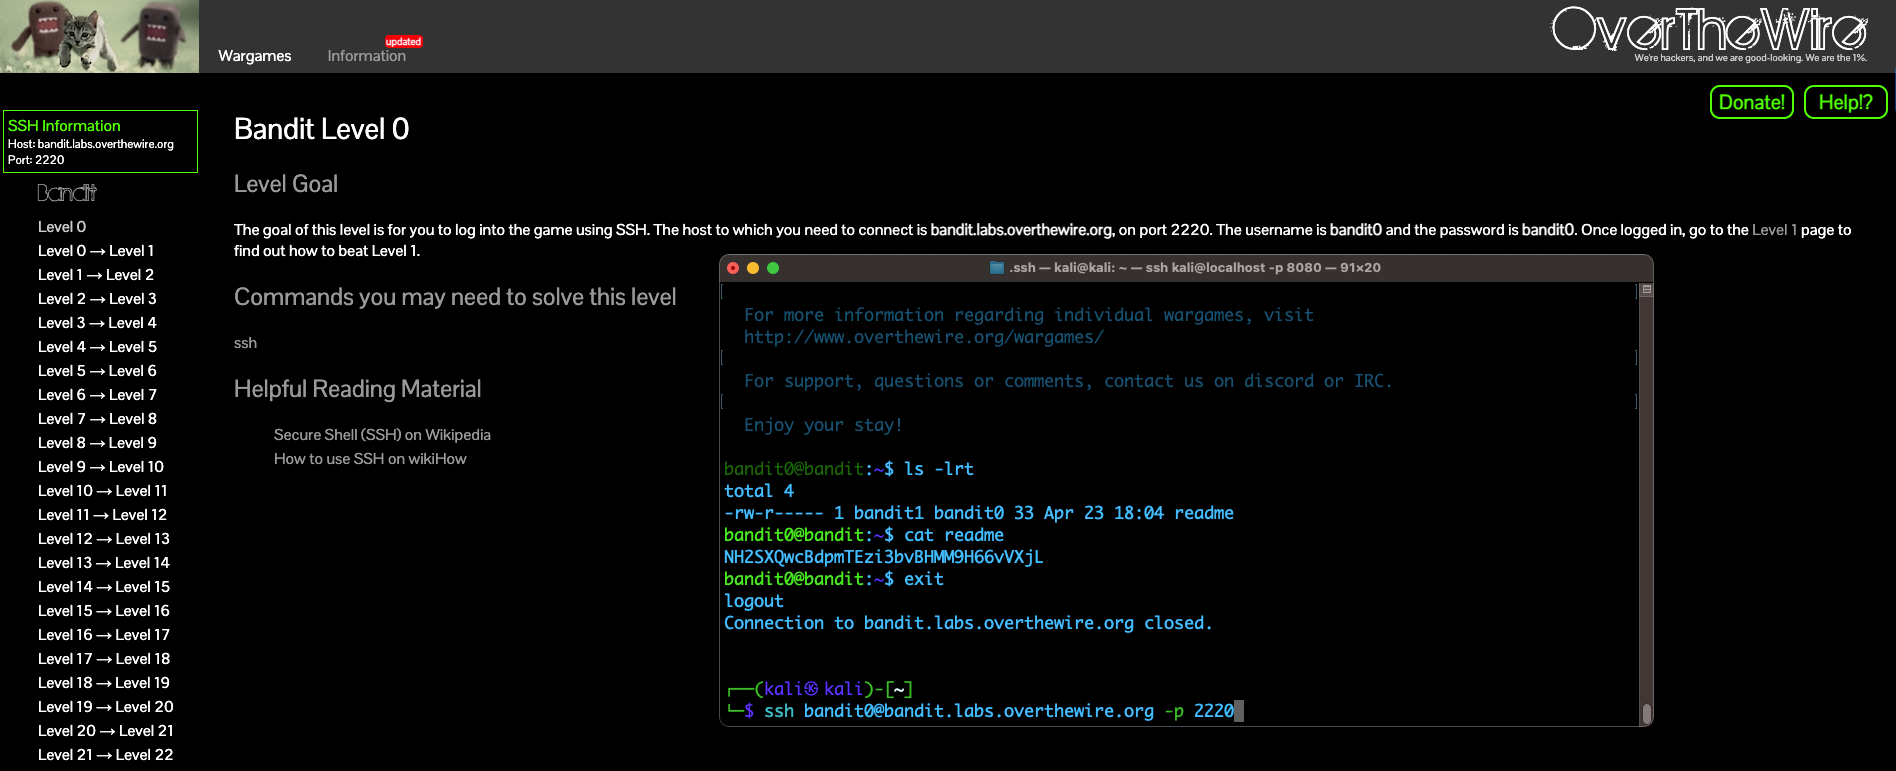
When it prompts you for the password, type bandit0 and hit enter.
You'll know when you're in. All that's left is to grab the flag...
... And we're done!
References
- VM Import/Export Permissions: https://docs.aws.amazon.com/vm-import/latest/userguide/required-permissions.html
- https://www.msp360.com/resources/blog/how-to-configure-vmimport-role/
- https://docs.aws.amazon.com/IAM/latest/UserGuide/access_policies_managed-vs-inline.html#inline-policies
- Importing a VM as an image using VM Import/Export: https://docs.aws.amazon.com/vm-import/latest/userguide/vmimport-image-import.html#export-vm-image
- Setting up Kali on AWS: https://www.kali.org/docs/cloud/aws/
- Setting up RDP on Kali: https://www.kali.org/docs/general-use/xfce-with-rdp/
- Over The Wire: https://overthewire.org/wargames/
- Backend: https://developer.hashicorp.com/terraform/language/settings/backends/configuration
- Providers: https://developer.hashicorp.com/terraform/cdktf/concepts/providers